This is a restoration of a 1988 Conde Flamenco Guitar with a badly repaired top from my repair archive completed in 2014.
Initially brought in to check out top crack repairs and delaminating golpe, it was soon evident that the top had been aggressively sanded to 0.6mm thick in some areas, and backed up with very rough messy internal patching.
The owner agreed that a new top was warranted. In order to keep this guitar as original as possible, the rosette was to be transferred from old to new top, and all bracing to be as per the original.
Photos show how much the top was thinned; when shining light internally the internal cleats could easily be seen.
The first step was to remove the bridge and fretboard end, to enable an accurate template to be made showing all brace and perimeter detail. The new top would be made as an exact replica of the current shape, irregularities and all for a drop in fit. This ensures that the sides maintain their shape and alignment without having to make an external form.
You can see in this photo rosette damage from a previous crack in the bass side of the fingerboard. Once removed the rosette was softened with steam to manipulate and secure the fragile area. (Since the treble side was in good shape, the rosette was later installed with a few degrees of rotation, hiding the damage area under the fretboard). The rosette is then glued face down to a temporary substrate, the old spruce cleaned from the underside, and then re inlayed into a new European spruce top. The whole process removing not more than 0.2mm of material from the original rosette when completed.
Split brace material was chosen to be similar in grain and shape to the original maintaining as much as possible to the original makers concept.
The top glued back on, and the original binding repaired in two areas that were over sanded near the neck.
The fingerboard end re fitted, and the board levelled and re fretted before re finishing the top. and re gluing the bridge. The owner was thrilled that his main instrument now has a long future ahead.
This is a restoration of an old 1930-40’s East German ‘Trade’ Mandolin from my repair archive completed in 2003.
Of sentimental value to the owner this instrument presented in a very bad state of repair. This was a “trade” instrument, something that would be made in a factory for music or department store sale as opposed to an individual maker. Its hard to see from the photos but the top had badly buckled around the sound hole and was severely over sanded in many places resulting in it becoming unplayable. The other main issue was the back had several large cracks and was separating from the sides. For want of a better description, the internal woodwork and bracing were more “agricultural” than fine craftsmanship.
My brief from the owner was to make it playable with modern strings so it could be used as opposed to hung on a wall as a decoration. The collectible value of this instrument is very low – even in in good condition so it made sense to make it as playable as possible whilst retaining its visual charm.
The overall approach was to restore completely by making a new top and to transfer the original top inlay from old to new. This is a challenge in and of itself. To flatten a lifting inlay, temporarily support it and re inlay it whilst loosing as little thickness as possible when the total thickness is only 0.5mm to start with.
The back and top were removed, first the back was disassembled and all cracks re glued, and then re braced with quality quartered spruce a opposed to the low grade pine used originally. With the back replaced, the linings were added to to allow good gluing surface for the new top. Turning attention to the top, the inlay was cut out of the old top, flattened and glued to a temporary substrate before being re inlayed into the new top.
The top was then re braced with an X pattern to allow it to be used with modern strings, the pattern arrived upon to approximate the stiffness of a graduated arched top. After re assembly and binding, the fretboard was added to to establish an appropriate neck/string angle, and a new bridge made ion the original style.
With Brazilian Rosewood back/sides and all new European spruce top and bracing it functioned and sounded amazing whilst retaining the original look and character. It has been in service since the re build for many years and still going strong.
https://www.mallia.com.au/wp/wp-content/uploads/2018/01/100_3984.jpg20321524Jeff Malliahttps://www.mallia.com.au/wp/wp-content/uploads/2013/04/HOME-PAGE-LOGO-JM_004.pngJeff Mallia2018-01-15 13:50:582018-01-16 12:20:261930's German Mandolin Top Replacement
This is a repair from my archive completed in 2012
One of a limited run of the popular Martin Lawrence Juber OM which was made using Brazilian Rosewood for the back and sides. Unfortunately as can be seen it sustained a severe impact on the bass lower side which shattered the side. A repair like this demands a huge amount of patience; Once a plan for the sequence of crack alignment and repair was thought out it essentially is a series of many single crack alignment/glue up sessions.
The alignment of these cracks turned out so well that when sanding for finish sealing etc, the absolute minimum of material was removed maintaining the side thickness/integrity. After a finishing a full neck re set and setup made this guitar look and feel as good as new restoring its status of “favourite guitar” for its owner.
https://www.mallia.com.au/wp/wp-content/uploads/2017/03/IMG_3237.jpg23043072Jeff Malliahttps://www.mallia.com.au/wp/wp-content/uploads/2013/04/HOME-PAGE-LOGO-JM_004.pngJeff Mallia2018-01-15 12:43:562018-01-16 19:17:01Martin OMC-28 Lawrence Juber Brazilian Side Damage Repair
This 80’s Les Paul had a hard life. It’s white finish has worn to a really appealing aged look. Unfortunately along the way someone has added an extra coil tap switch, strap hole and done some less than neat repair work to the head binding.
The new owner wanted to get this back to a respectable original looking state.
Dowelling this hole with a simle round plug is fine, but ultimately eventually no matter how nice the finish work is, the round shape will reveal itself in the shine of the finish.
To avoid this happening the shape is changed so that a well mating piece will be more like a laminate than a plug. To do this the hole is “countersunk” and a mating piece is fitted using a technique known as chalk fitting. This allows an irregular shaped piece to be made to fit with 100% good contact. The result is a filled hole that will remain undetectable in years to come.
The ugly head binding repair was removed and new binding laminated up to match, and bent to fit nicely. The strap button holes were filled in a similar manner as the top hole.
Using lacquer to build the finish in the same layering as the original, the continuity of the aged clear over white look is maintained and distressed ot match the overall look. Also touched up was the finish overspray in the control ocavity to hide the repair internally.
The repair was a great success. This Les Paul was already a great playing and sounding guitar and now has looks to match.
https://www.mallia.com.au/wp/wp-content/uploads/2015/04/les_paul_custom_10.jpg14081056Jeff Malliahttps://www.mallia.com.au/wp/wp-content/uploads/2013/04/HOME-PAGE-LOGO-JM_004.pngJeff Mallia2015-04-18 13:01:382018-01-15 15:19:34Les Paul Custom
1965 Epiphone Casino Headstock Rebuild
/0 Comments/in Uncategorized /by Jeff Mallia1988 Hermanos Conde Flamenco Guitar Top Replacement
/0 Comments/in Frontpage Article, restorations /by Jeff MalliaThis is a restoration of a 1988 Conde Flamenco Guitar with a badly repaired top from my repair archive completed in 2014.
Initially brought in to check out top crack repairs and delaminating golpe, it was soon evident that the top had been aggressively sanded to 0.6mm thick in some areas, and backed up with very rough messy internal patching.
The owner agreed that a new top was warranted. In order to keep this guitar as original as possible, the rosette was to be transferred from old to new top, and all bracing to be as per the original.
Photos show how much the top was thinned; when shining light internally the internal cleats could easily be seen.
You can see in this photo rosette damage from a previous crack in the bass side of the fingerboard. Once removed the rosette was softened with steam to manipulate and secure the fragile area. (Since the treble side was in good shape, the rosette was later installed with a few degrees of rotation, hiding the damage area under the fretboard). The rosette is then glued face down to a temporary substrate, the old spruce cleaned from the underside, and then re inlayed into a new European spruce top. The whole process removing not more than 0.2mm of material from the original rosette when completed.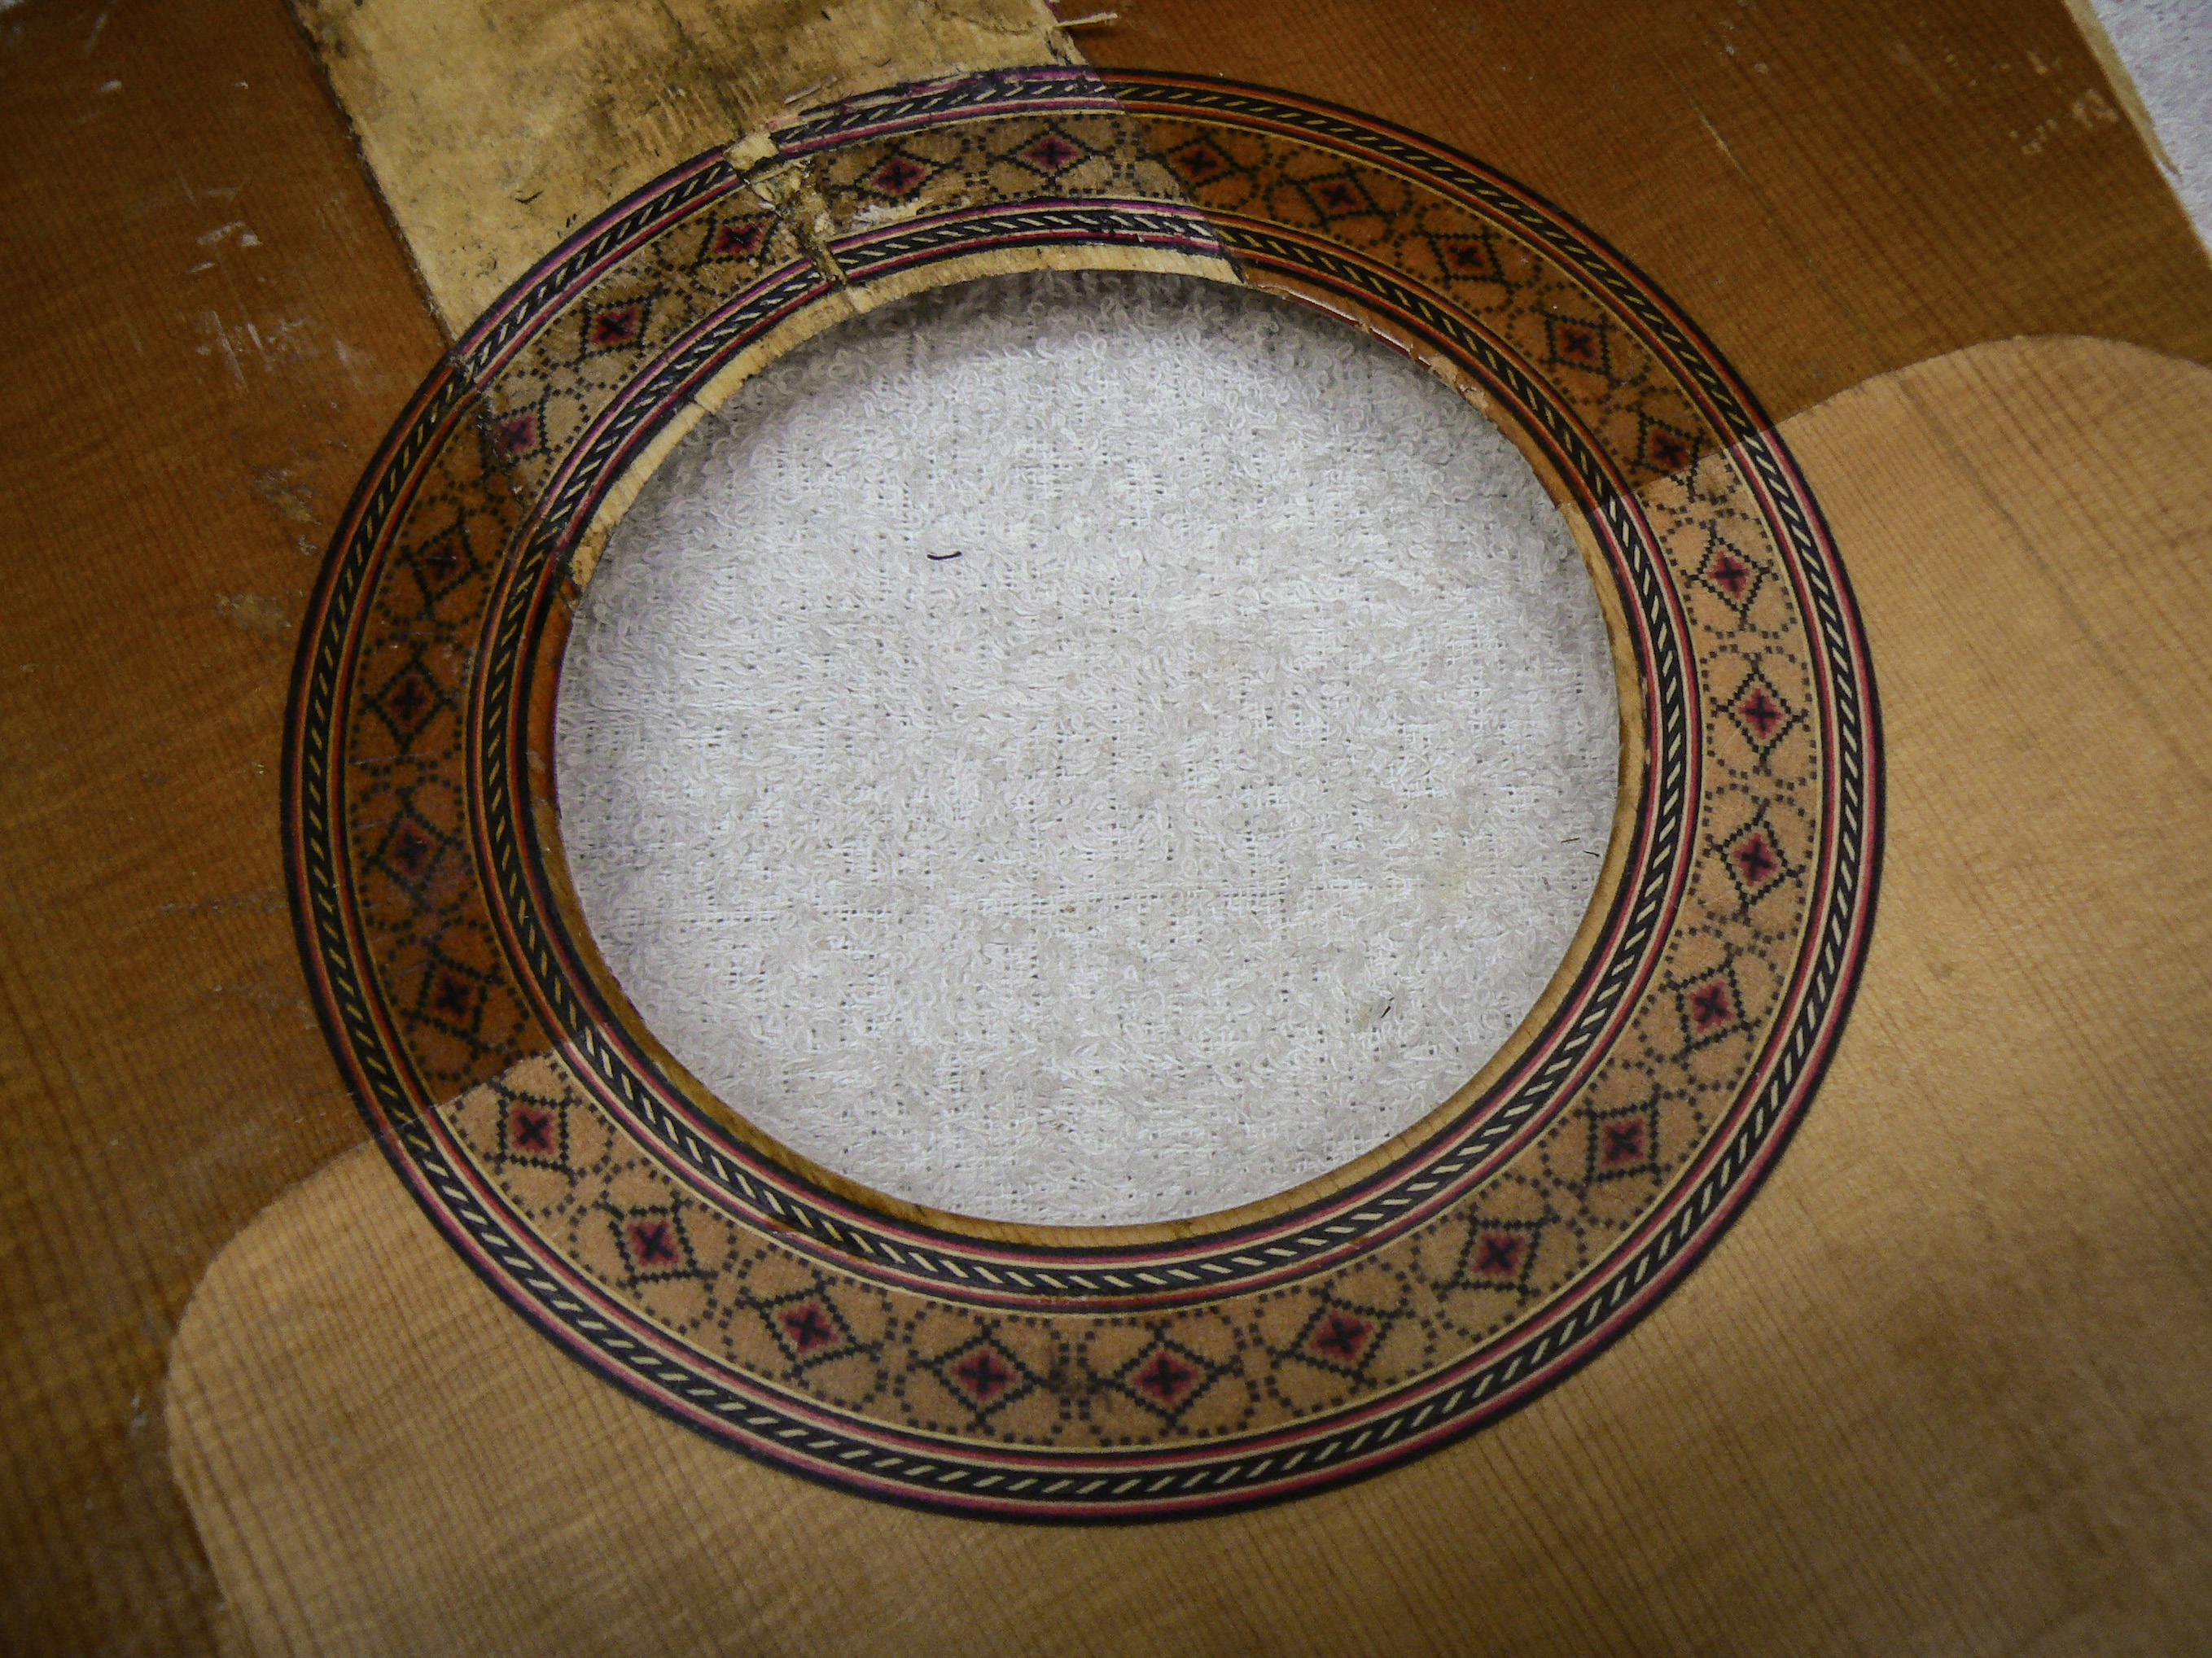
Split brace material was chosen to be similar in grain and shape to the original maintaining as much as possible to the original makers concept.
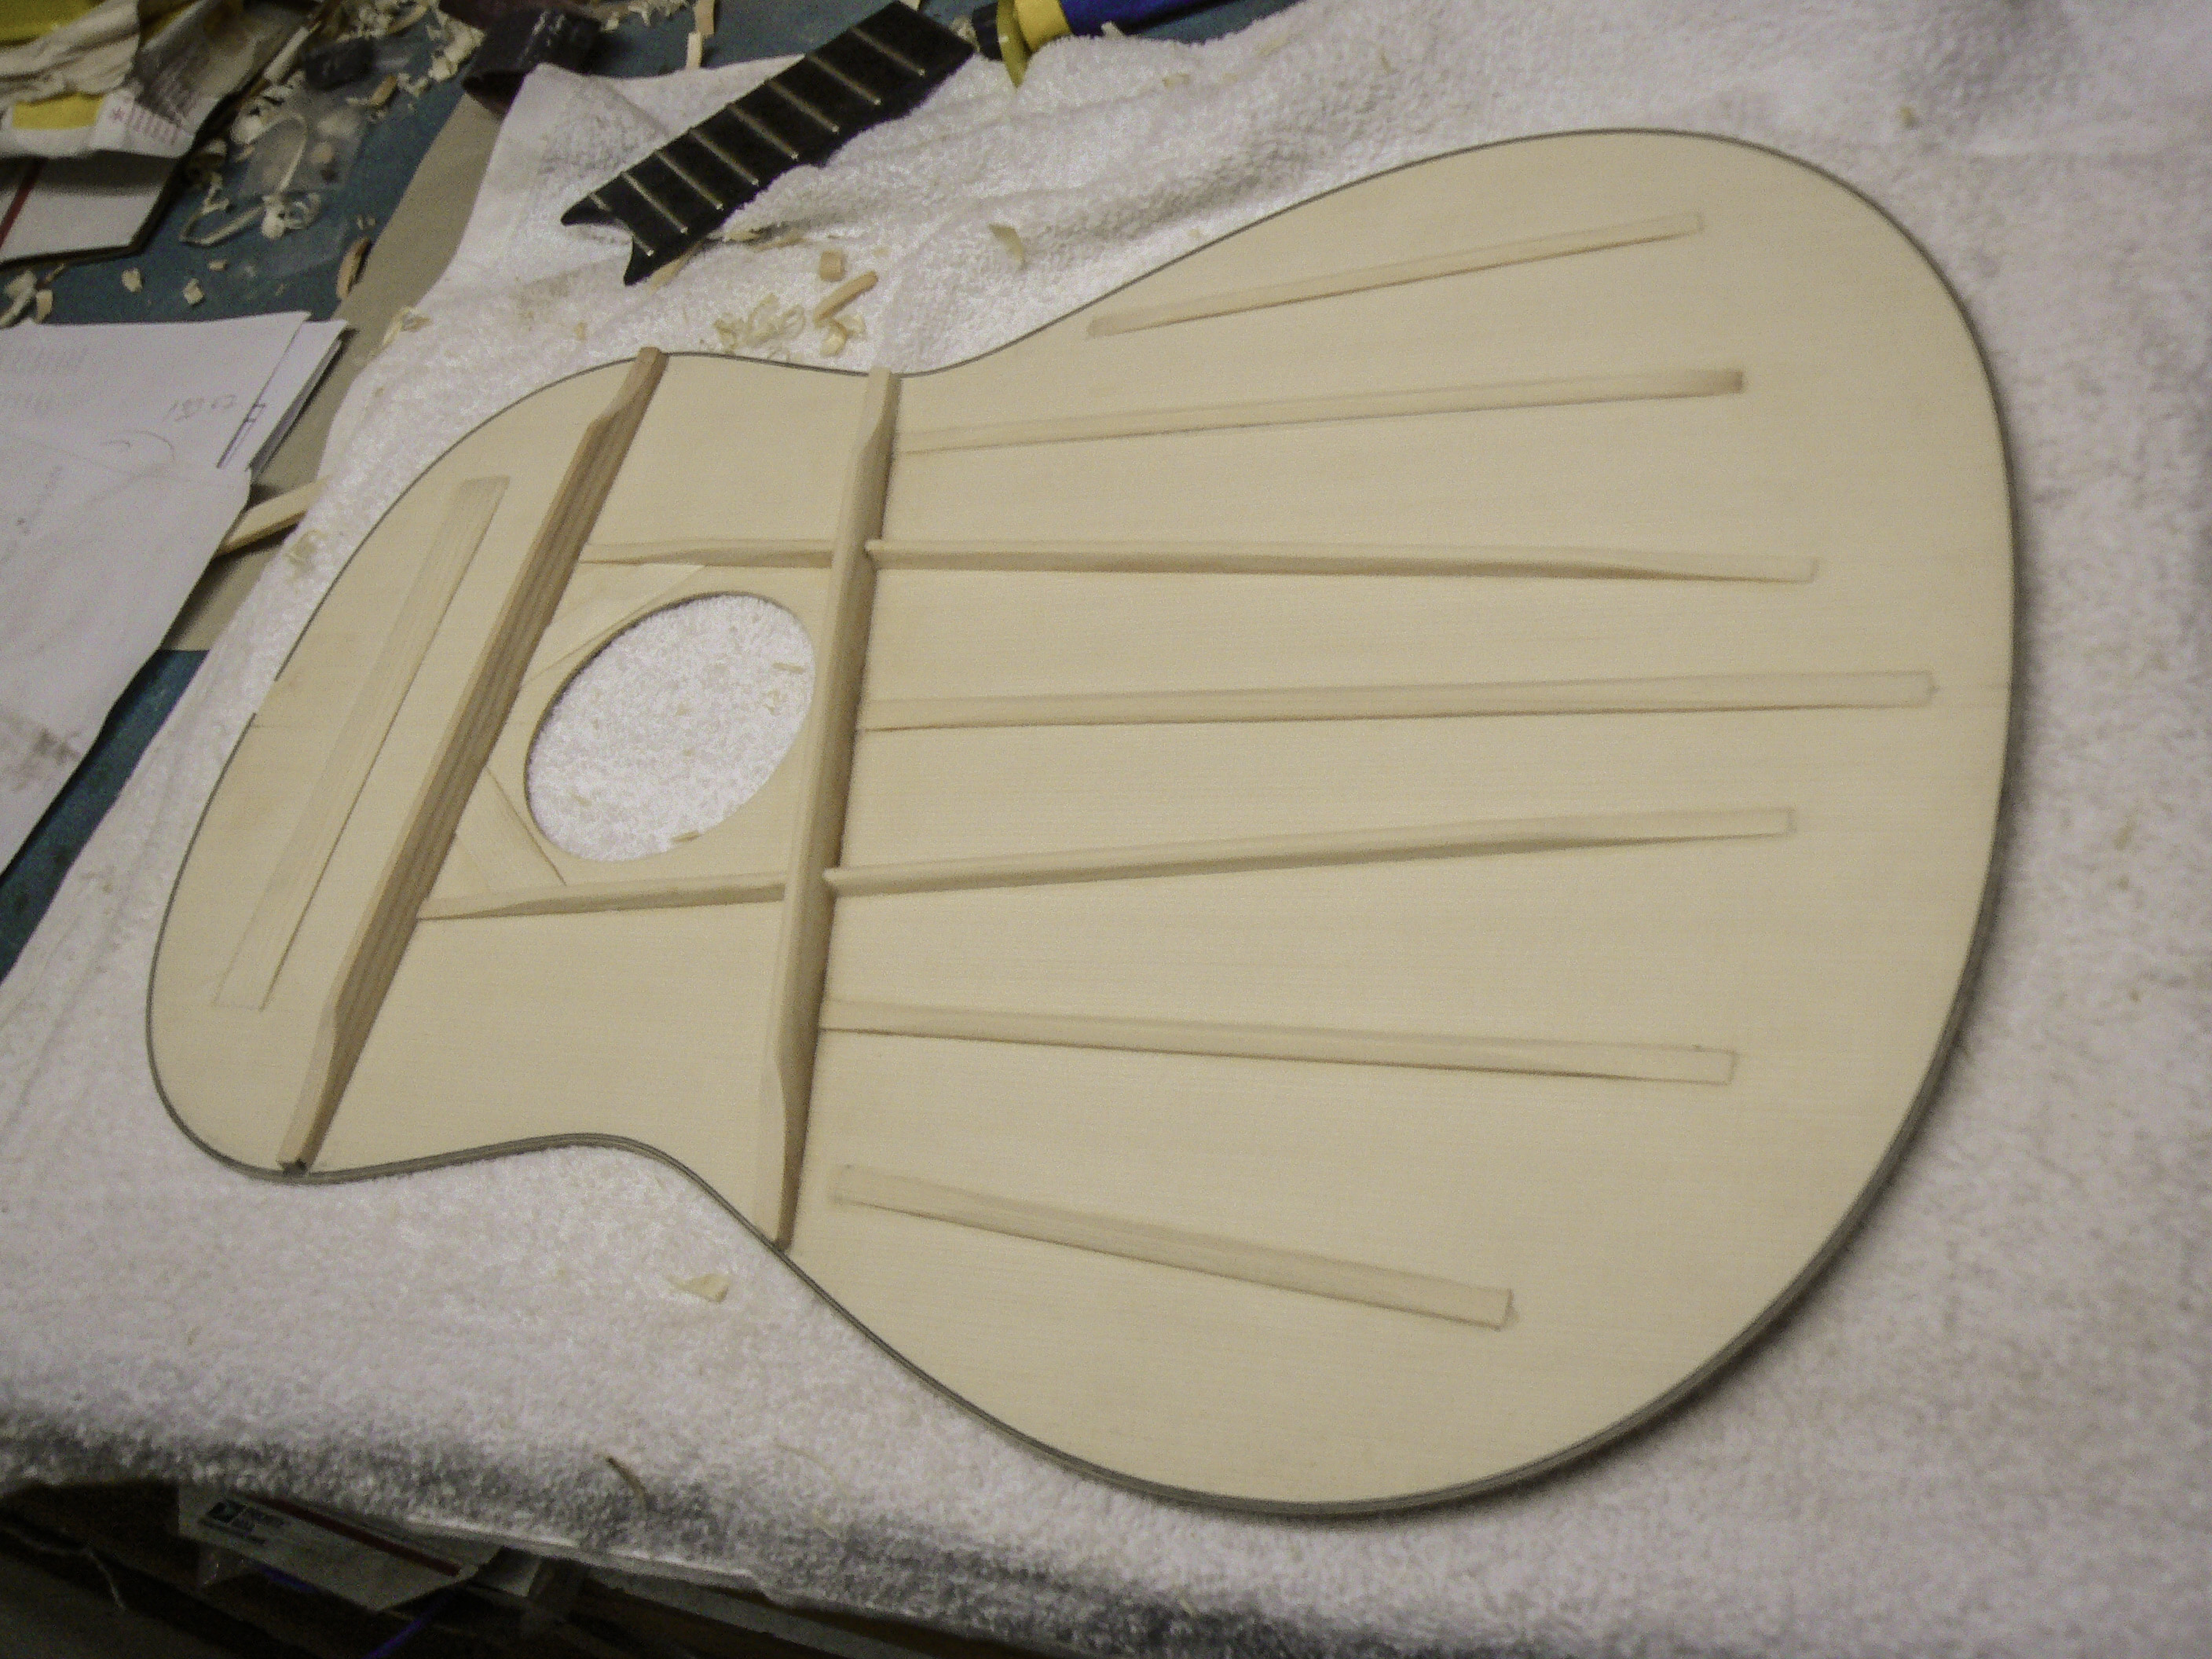


The top glued back on, and the original binding repaired in two areas that were over sanded near the neck.
The fingerboard end re fitted, and the board levelled and re fretted before re finishing the top. and re gluing the bridge. The owner was thrilled that his main instrument now has a long future ahead.
1930’s German Mandolin Top Replacement
/2 Comments/in Frontpage Article, restorations /by Jeff MalliaThis is a restoration of an old 1930-40’s East German ‘Trade’ Mandolin from my repair archive completed in 2003.
Of sentimental value to the owner this instrument presented in a very bad state of repair. This was a “trade” instrument, something that would be made in a factory for music or department store sale as opposed to an individual maker. Its hard to see from the photos but the top had badly buckled around the sound hole and was severely over sanded in many places resulting in it becoming unplayable. The other main issue was the back had several large cracks and was separating from the sides. For want of a better description, the internal woodwork and bracing were more “agricultural” than fine craftsmanship.
My brief from the owner was to make it playable with modern strings so it could be used as opposed to hung on a wall as a decoration. The collectible value of this instrument is very low – even in in good condition so it made sense to make it as playable as possible whilst retaining its visual charm.
The overall approach was to restore completely by making a new top and to transfer the original top inlay from old to new. This is a challenge in and of itself. To flatten a lifting inlay, temporarily support it and re inlay it whilst loosing as little thickness as possible when the total thickness is only 0.5mm to start with.
The back and top were removed, first the back was disassembled and all cracks re glued, and then re braced with quality quartered spruce a opposed to the low grade pine used originally. With the back replaced, the linings were added to to allow good gluing surface for the new top. Turning attention to the top, the inlay was cut out of the old top, flattened and glued to a temporary substrate before being re inlayed into the new top.
The top was then re braced with an X pattern to allow it to be used with modern strings, the pattern arrived upon to approximate the stiffness of a graduated arched top. After re assembly and binding, the fretboard was added to to establish an appropriate neck/string angle, and a new bridge made ion the original style.
With Brazilian Rosewood back/sides and all new European spruce top and bracing it functioned and sounded amazing whilst retaining the original look and character. It has been in service since the re build for many years and still going strong.
Martin OMC-28 Lawrence Juber Brazilian Side Damage Repair
/0 Comments/in Frontpage Article, restorations /by Jeff MalliaThis is a repair from my archive completed in 2012
One of a limited run of the popular Martin Lawrence Juber OM which was made using Brazilian Rosewood for the back and sides. Unfortunately as can be seen it sustained a severe impact on the bass lower side which shattered the side. A repair like this demands a huge amount of patience; Once a plan for the sequence of crack alignment and repair was thought out it essentially is a series of many single crack alignment/glue up sessions.
The alignment of these cracks turned out so well that when sanding for finish sealing etc, the absolute minimum of material was removed maintaining the side thickness/integrity. After a finishing a full neck re set and setup made this guitar look and feel as good as new restoring its status of “favourite guitar” for its owner.
Les Paul Custom
/1 Comment/in Frontpage Article, restorations /by Jeff MalliaThis 80’s Les Paul had a hard life. It’s white finish has worn to a really appealing aged look. Unfortunately along the way someone has added an extra coil tap switch, strap hole and done some less than neat repair work to the head binding.
The new owner wanted to get this back to a respectable original looking state.
Dowelling this hole with a simle round plug is fine, but ultimately eventually no matter how nice the finish work is, the round shape will reveal itself in the shine of the finish.
To avoid this happening the shape is changed so that a well mating piece will be more like a laminate than a plug. To do this the hole is “countersunk” and a mating piece is fitted using a technique known as chalk fitting. This allows an irregular shaped piece to be made to fit with 100% good contact. The result is a filled hole that will remain undetectable in years to come.
The ugly head binding repair was removed and new binding laminated up to match, and bent to fit nicely. The strap button holes were filled in a similar manner as the top hole.
Using lacquer to build the finish in the same layering as the original, the continuity of the aged clear over white look is maintained and distressed ot match the overall look. Also touched up was the finish overspray in the control ocavity to hide the repair internally.
The repair was a great success. This Les Paul was already a great playing and sounding guitar and now has looks to match.
1968 Gibson SG Neck replacement
/in restorations /by Jeff Mallia