This 1965 Epiphone Casino Head rebuild was completed in November 2012.
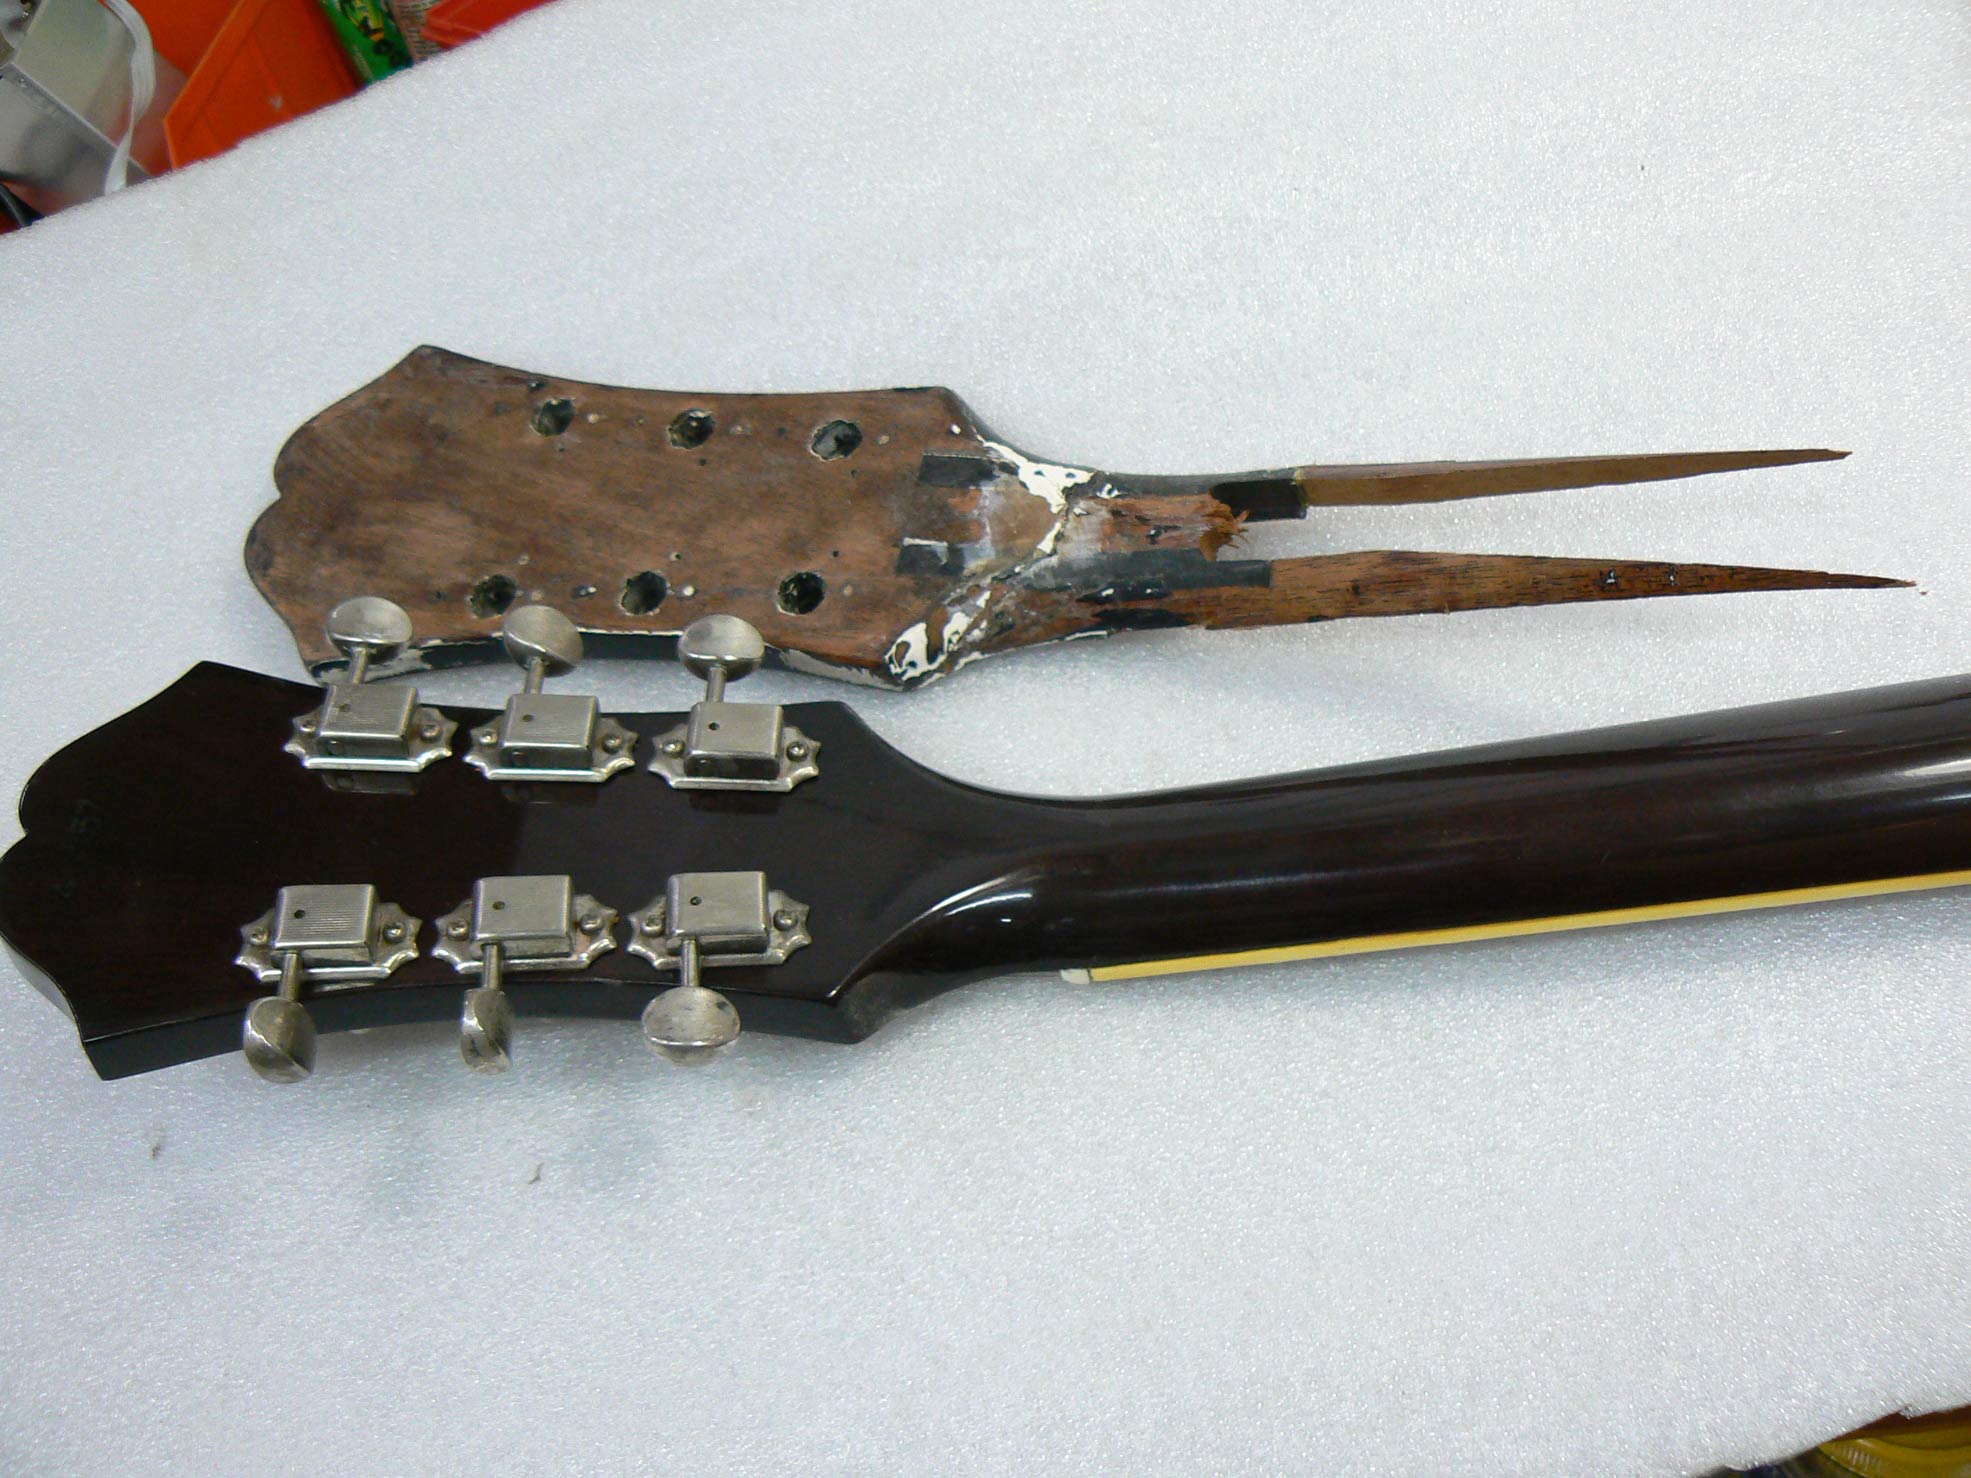
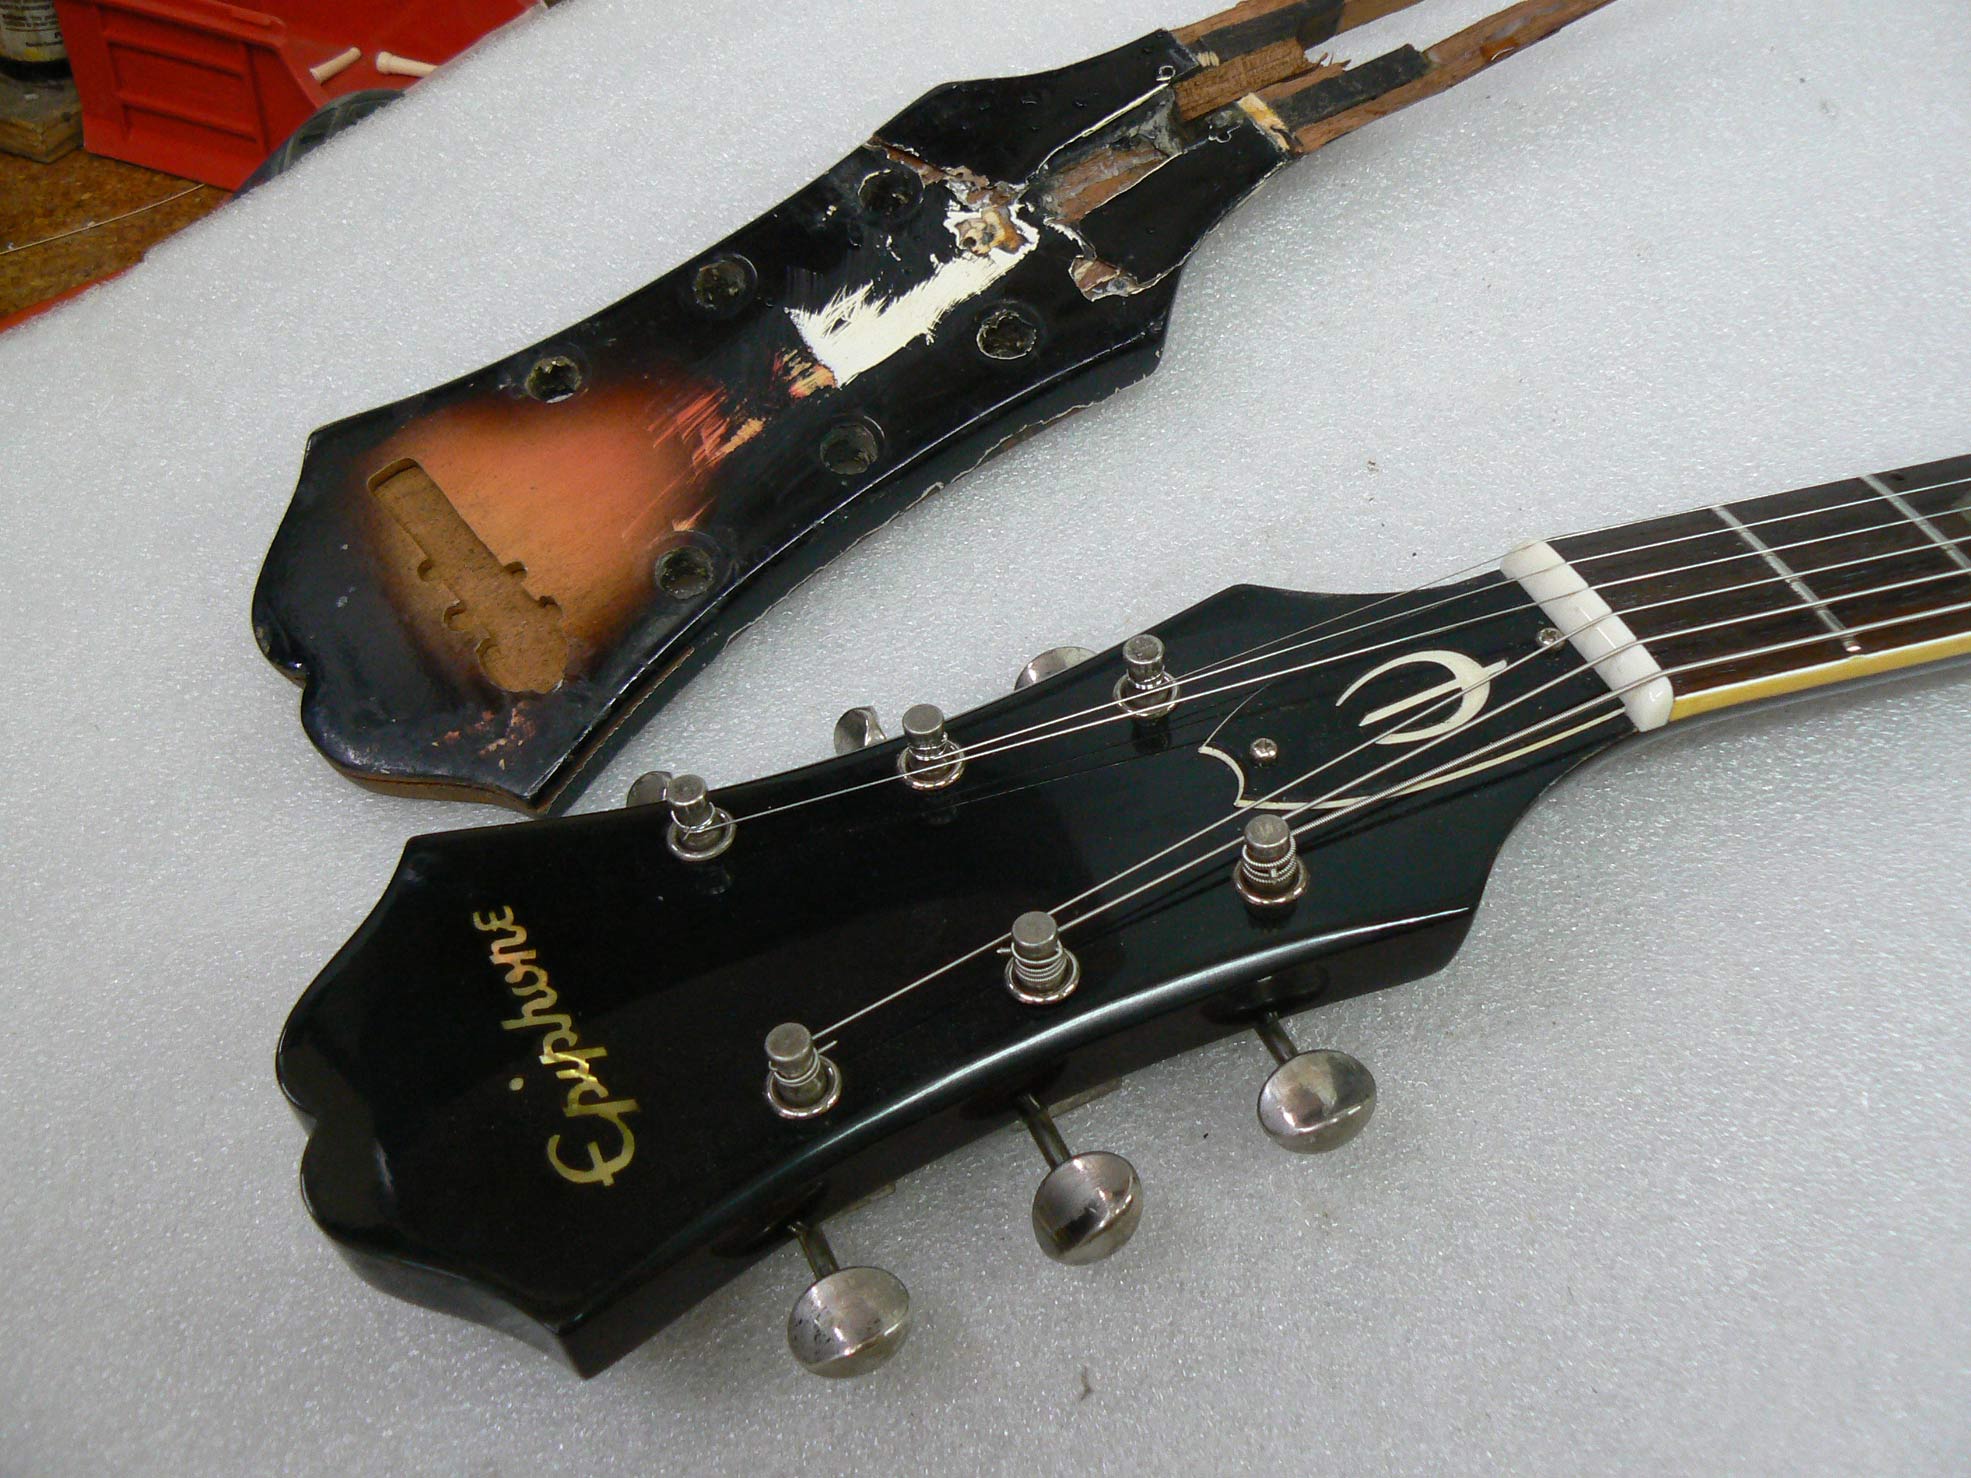
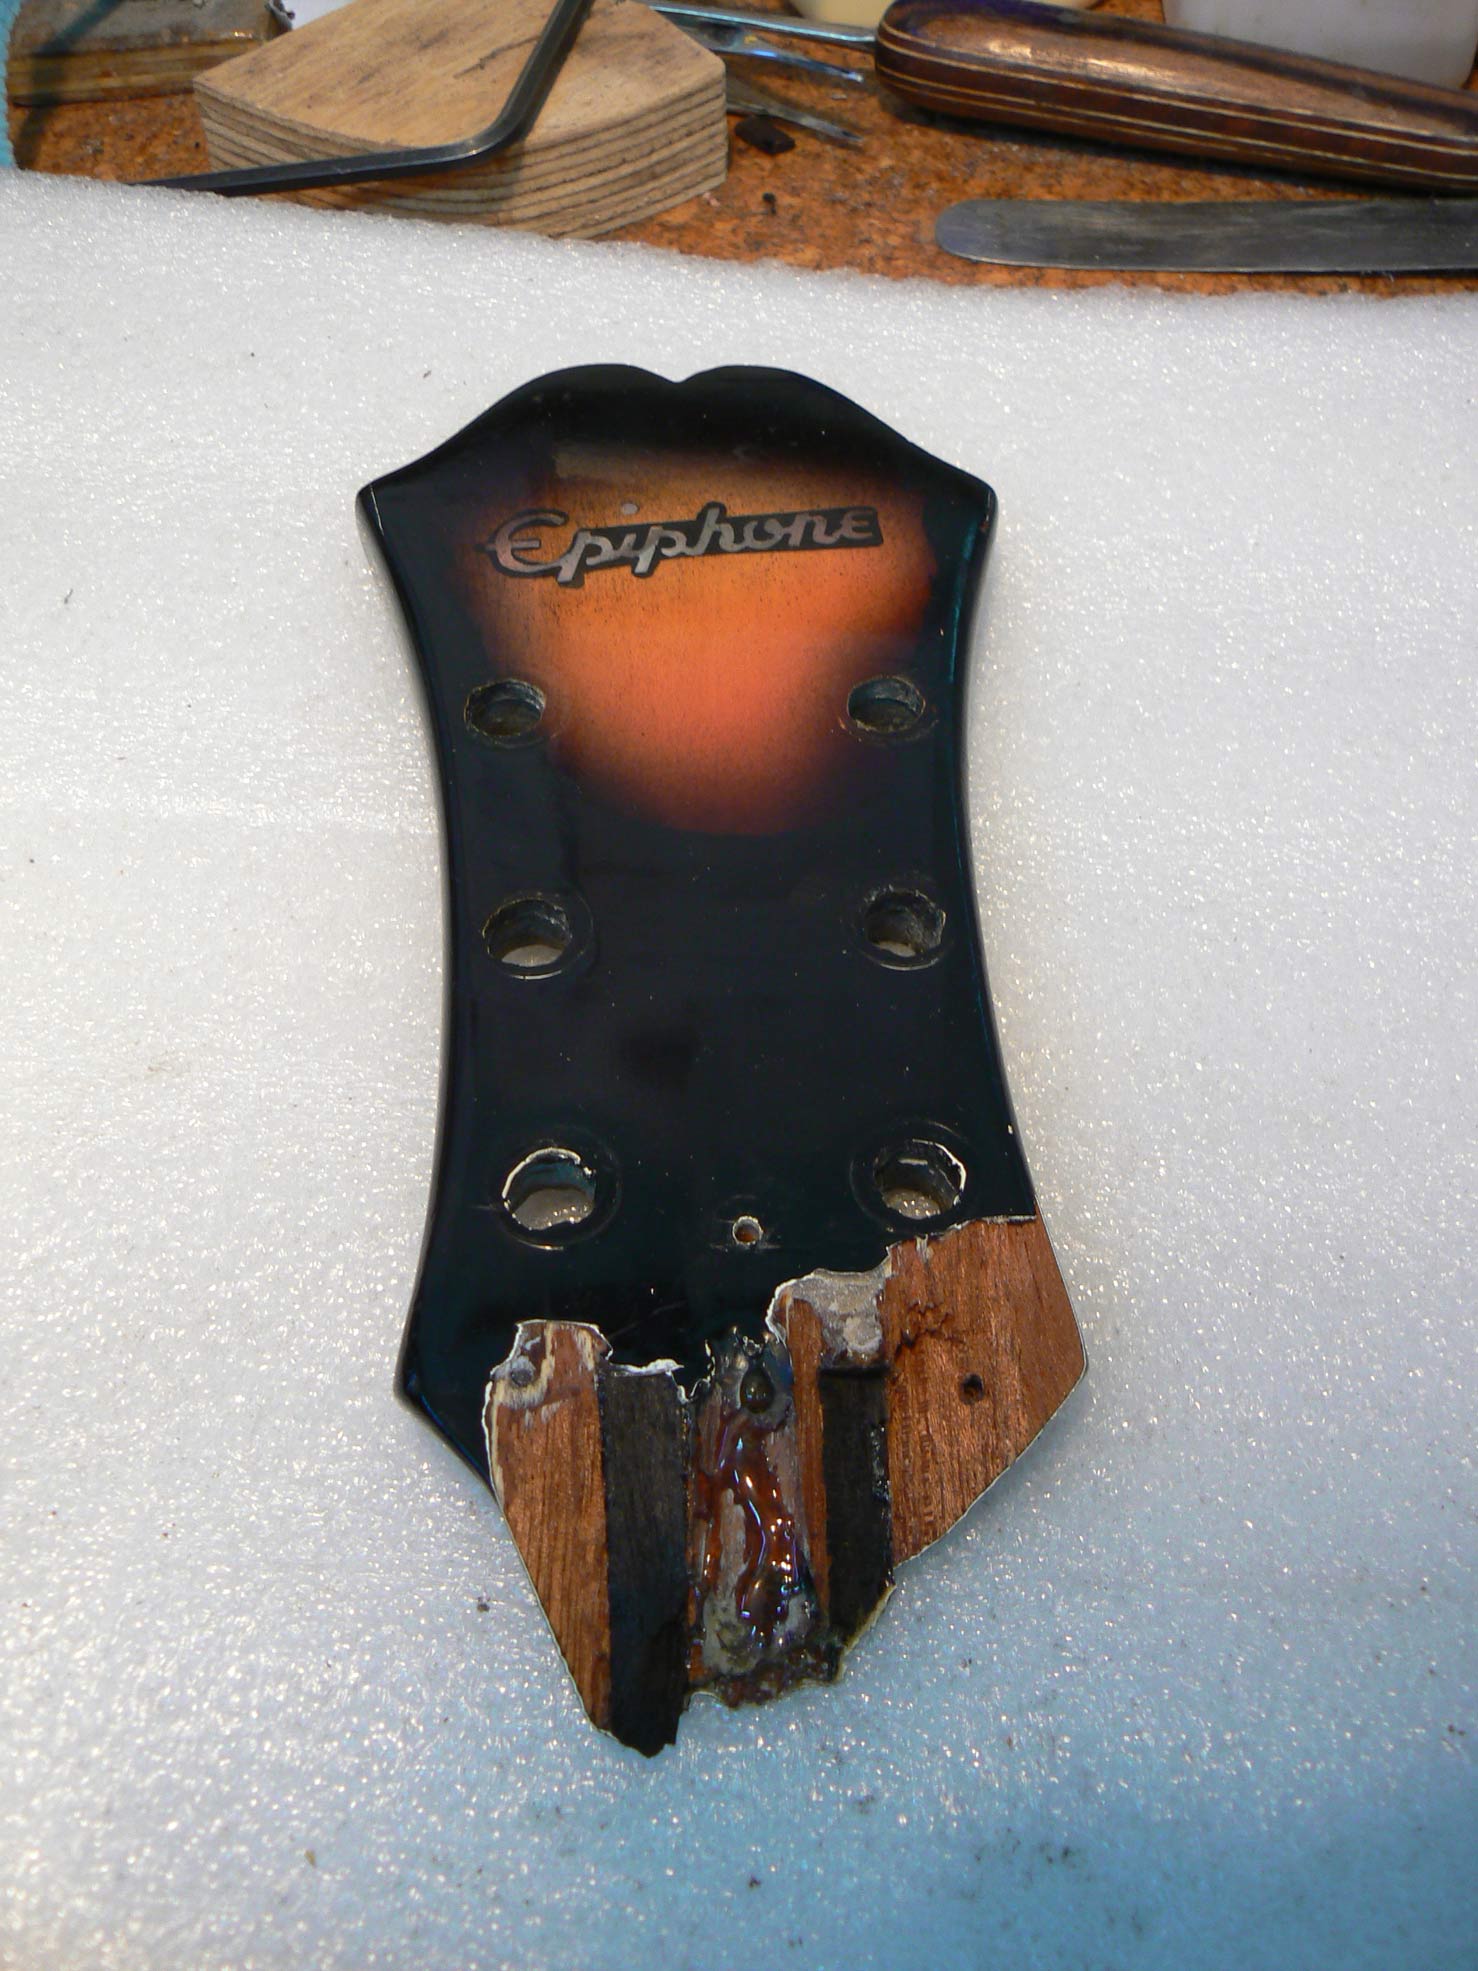
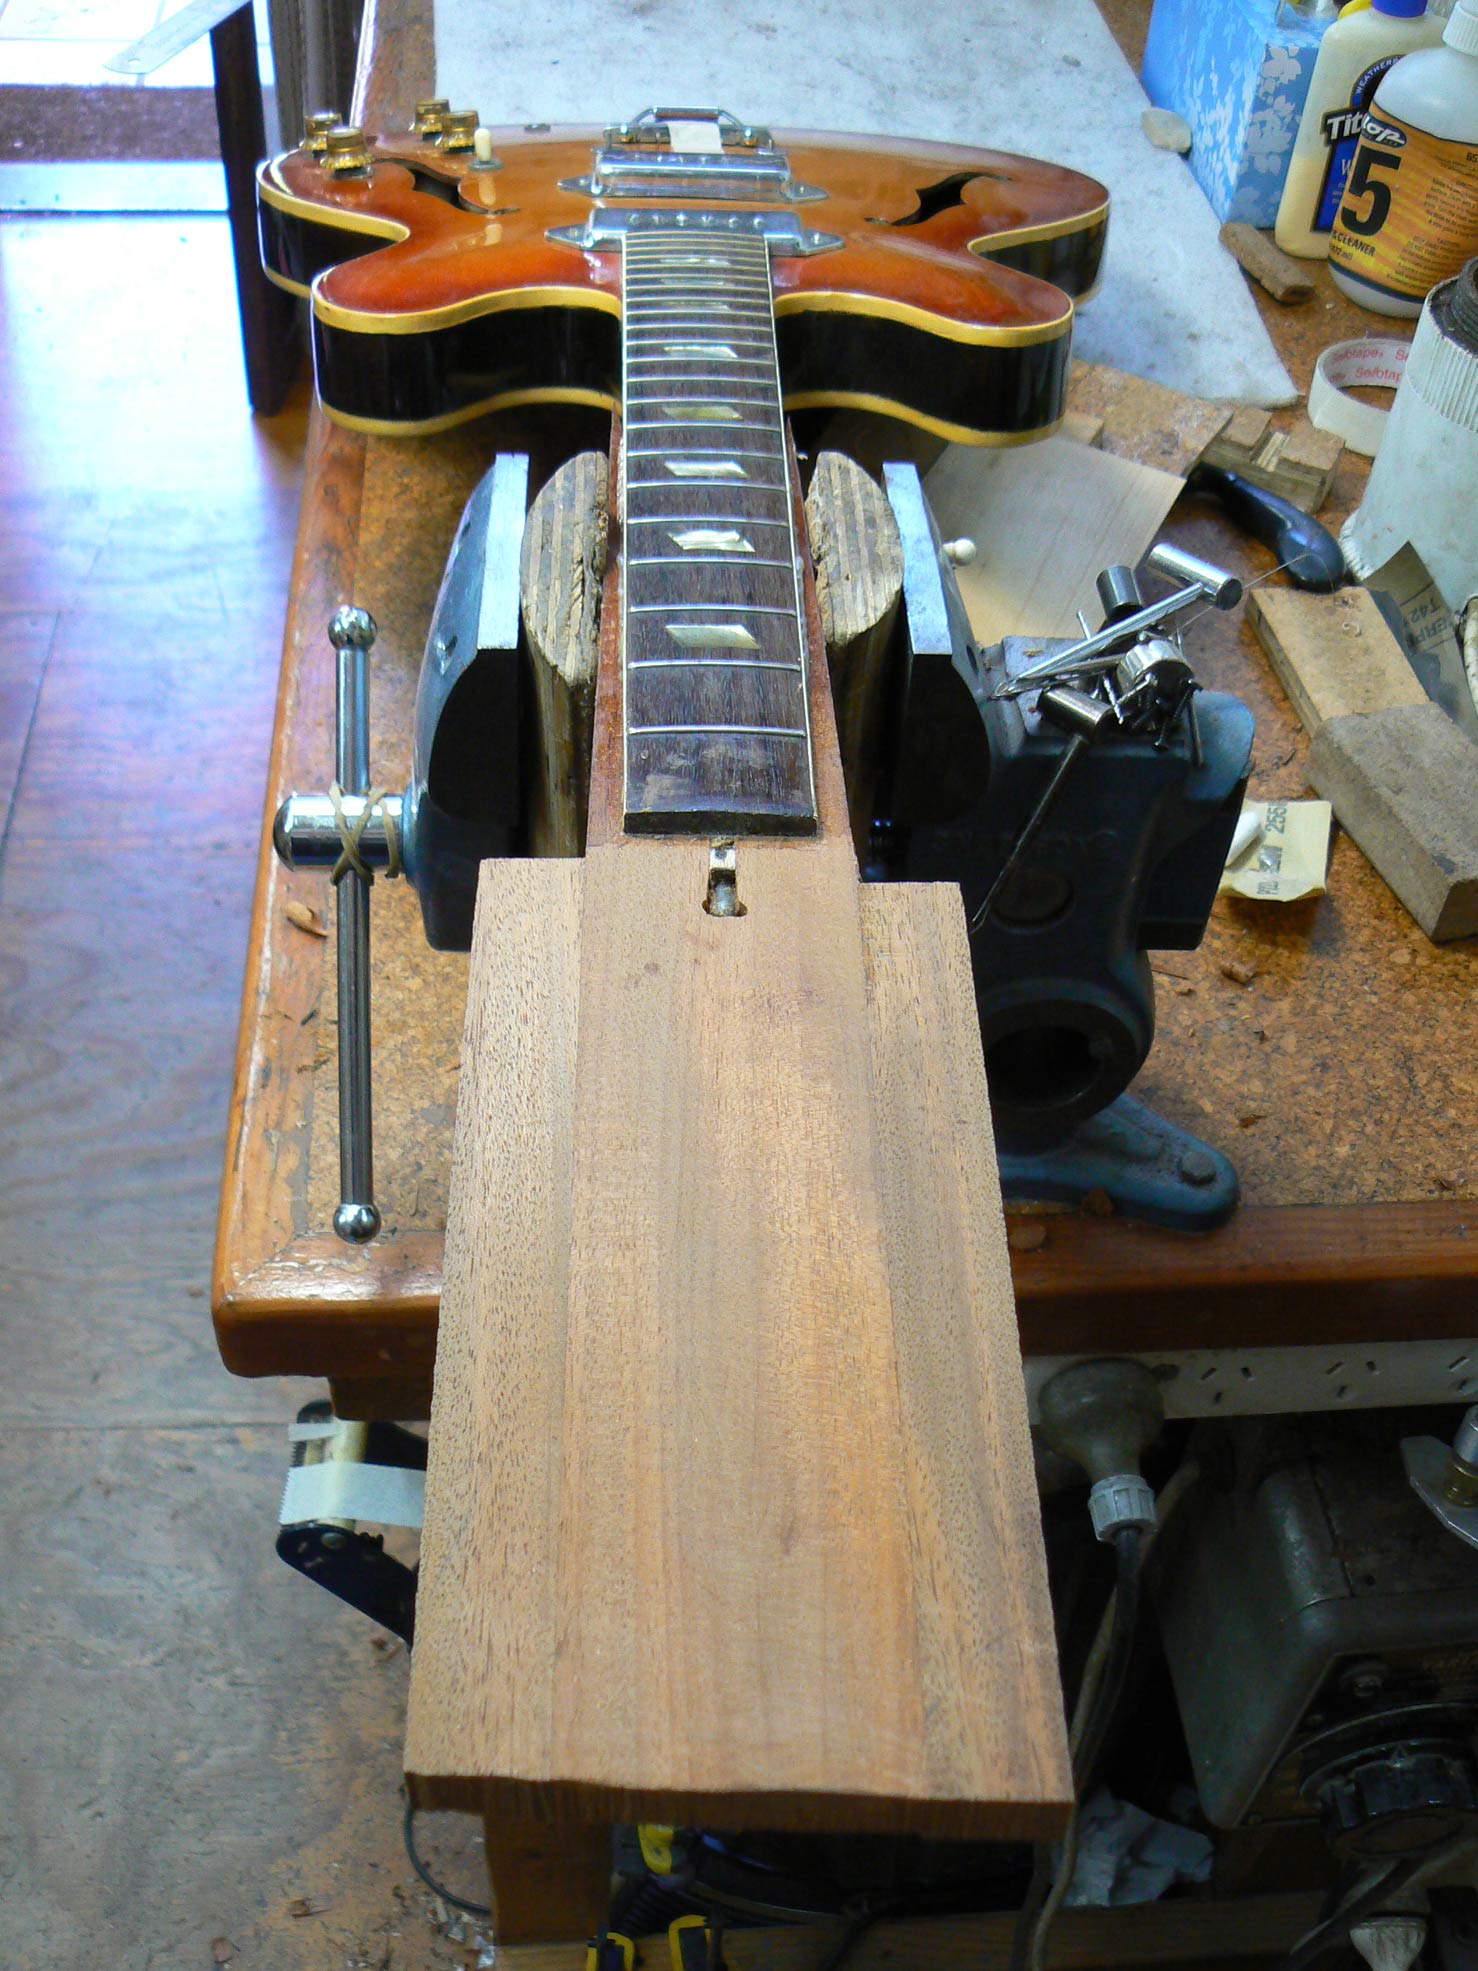
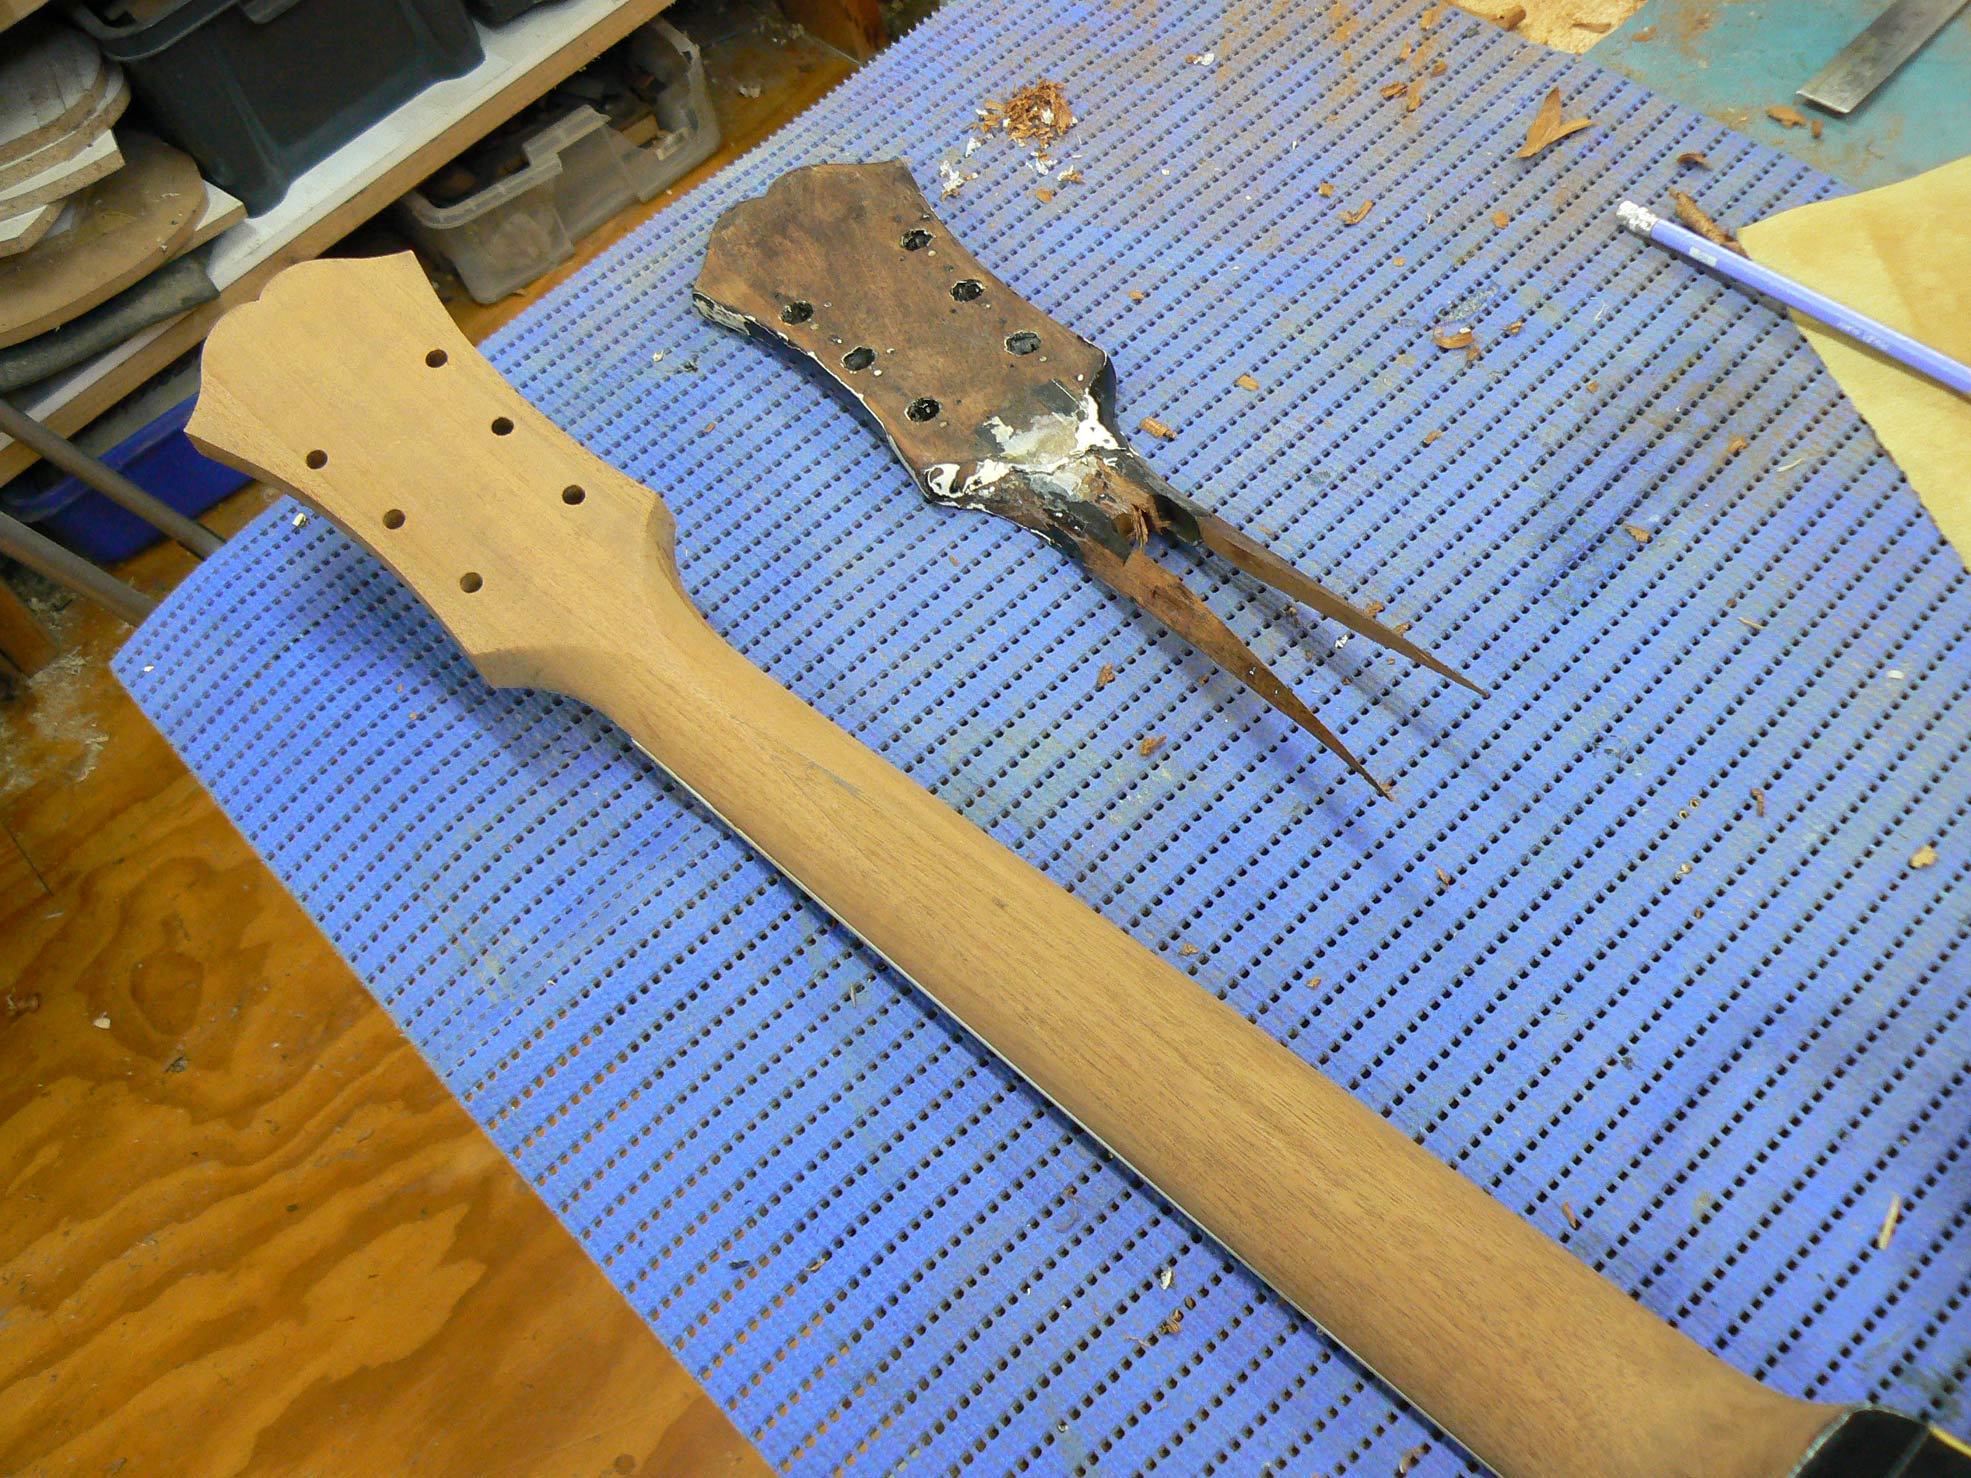
This guitar had a head that had been snapped off and re glued what looks like at least a few times. The head was “splined” with ebony pieces, and had many voids filled with epoxy and auto body filler. The headstock face was sanded through its original finish, revealing the light face veneer, and the head was generally over sanded and finished in a horrible black/burst paint. Whilst the neck was overcoated ion solid black right down to the heel, it still had original walnut brown lacquer underneath, and the fretboard was in original condition.
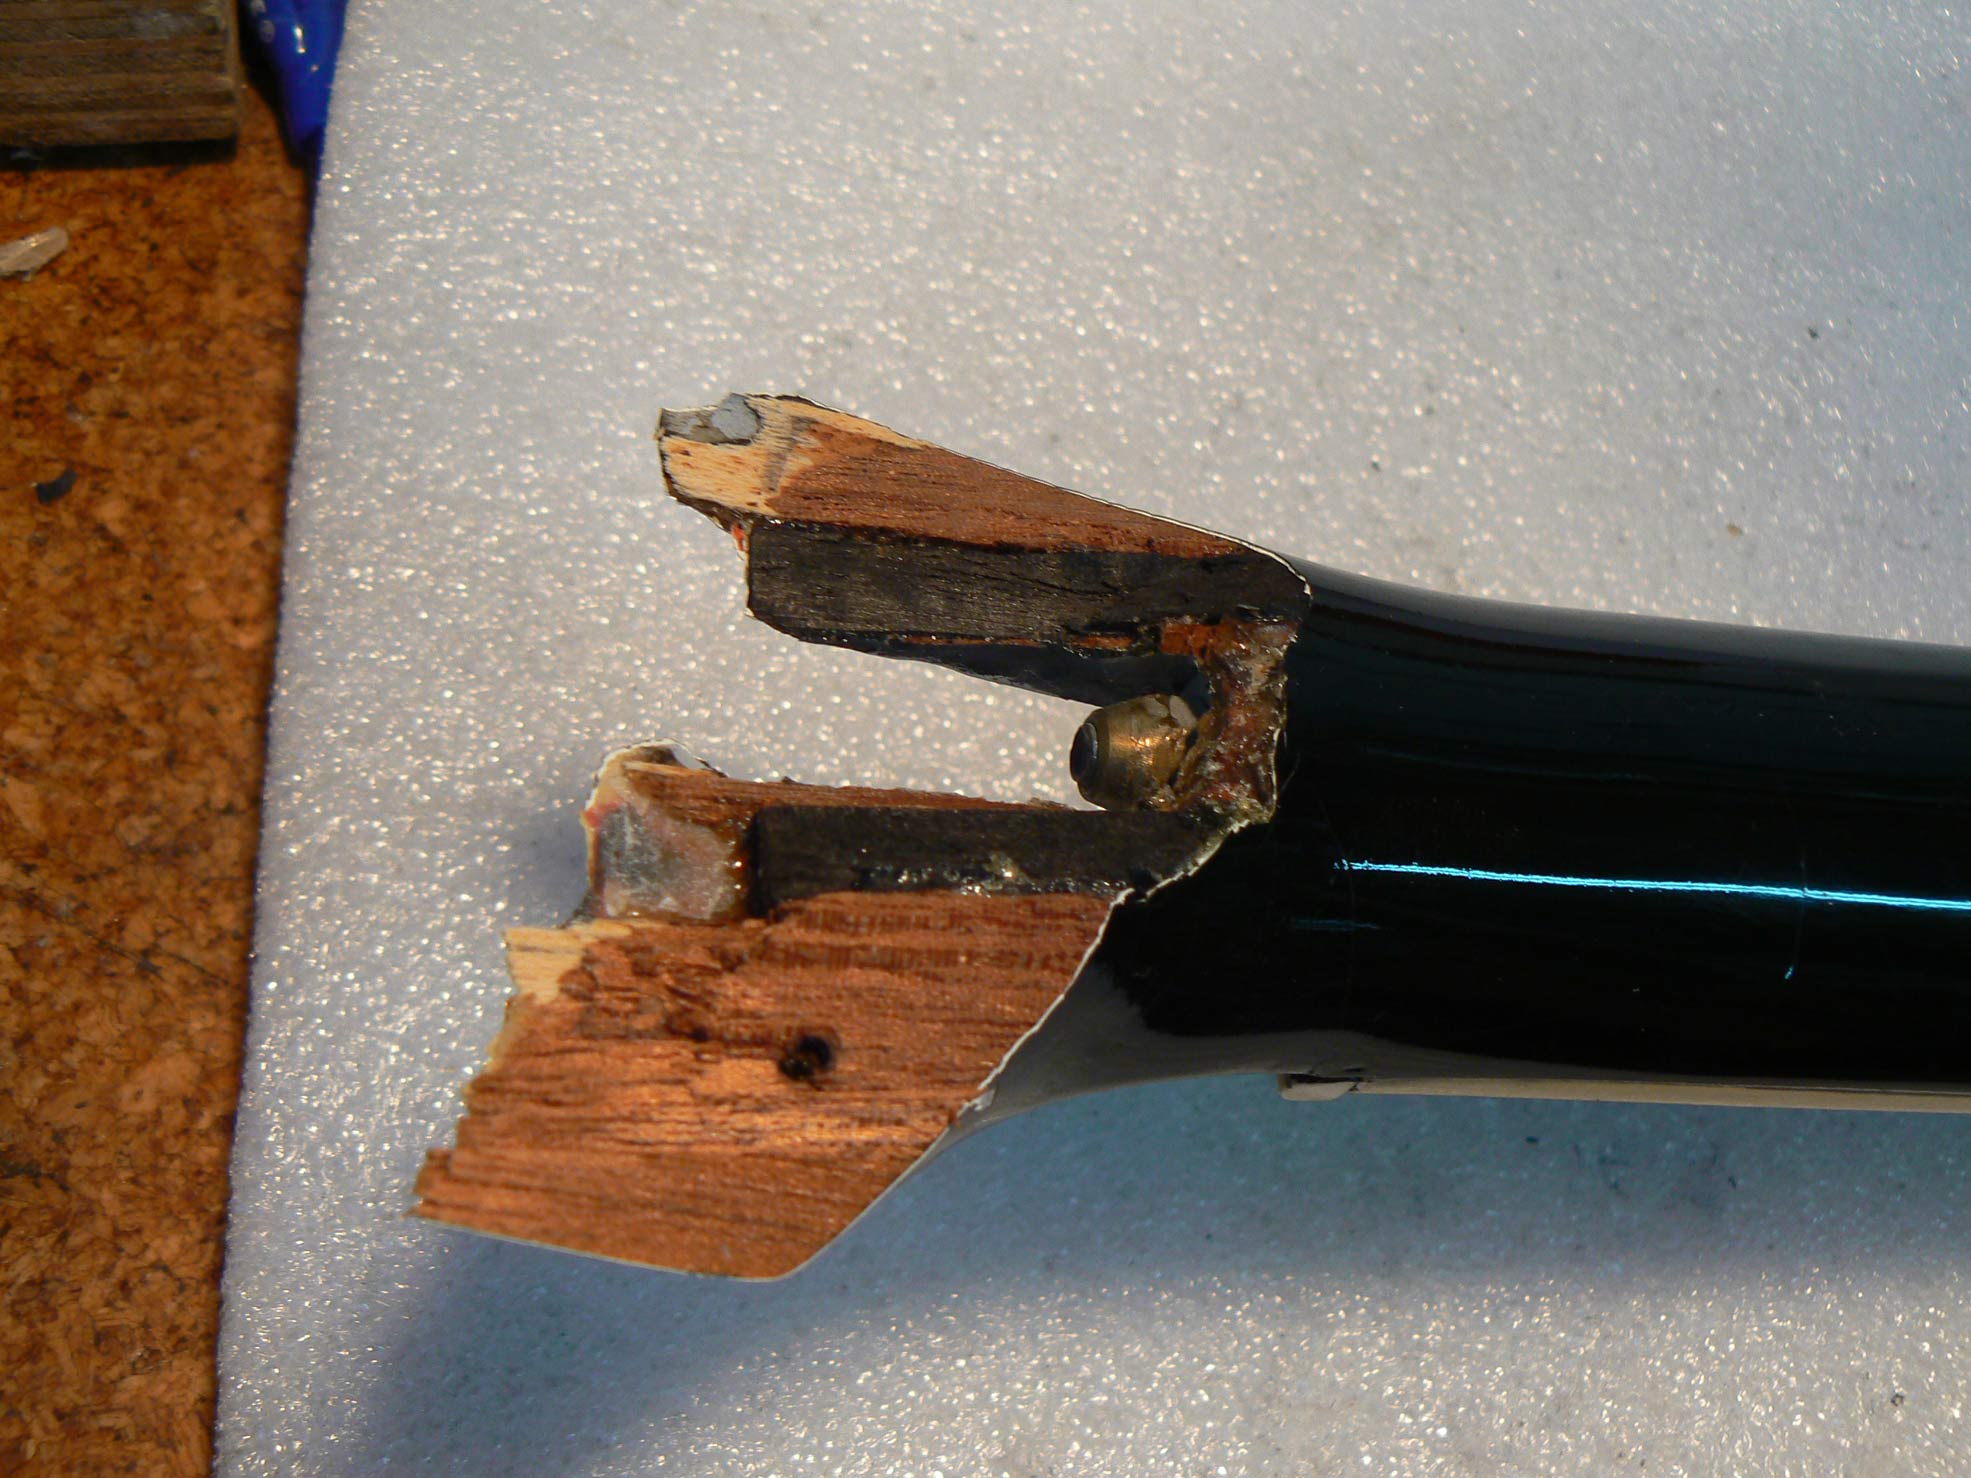

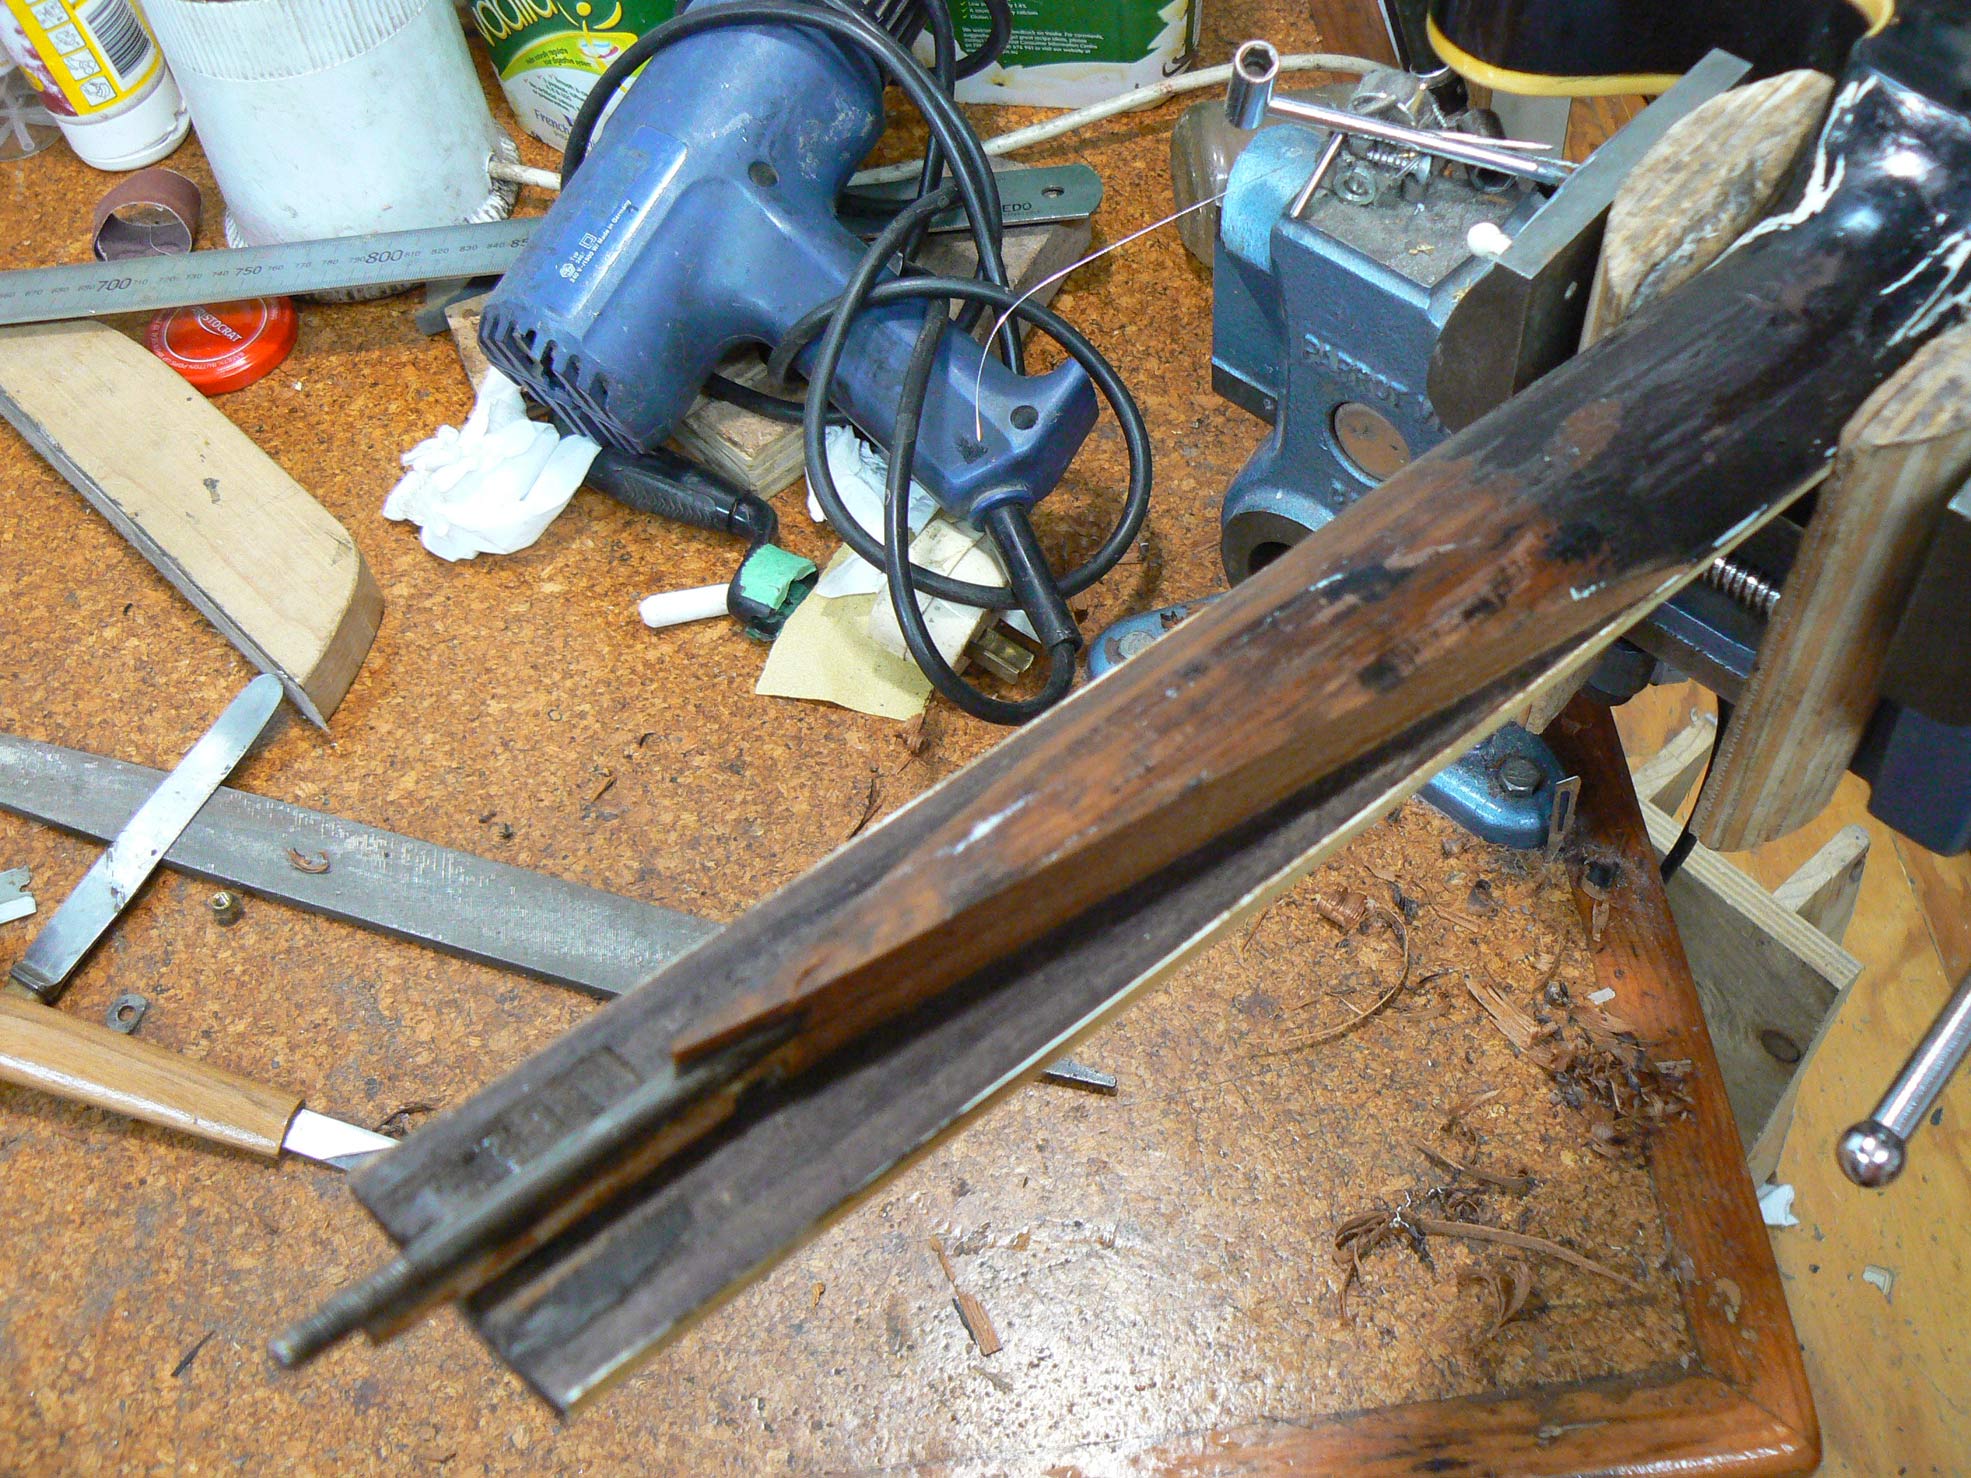
Whilst the owner had been offered repairs that involved a complete neck replacement, he was more concerned with keeping as much of the original neck as possible. I have repaired head breaks in many ways and am always open to trying a new approach. Ive used this approach a few times prior and since – to graft a new head onto the neck over a long surface area splice joint.
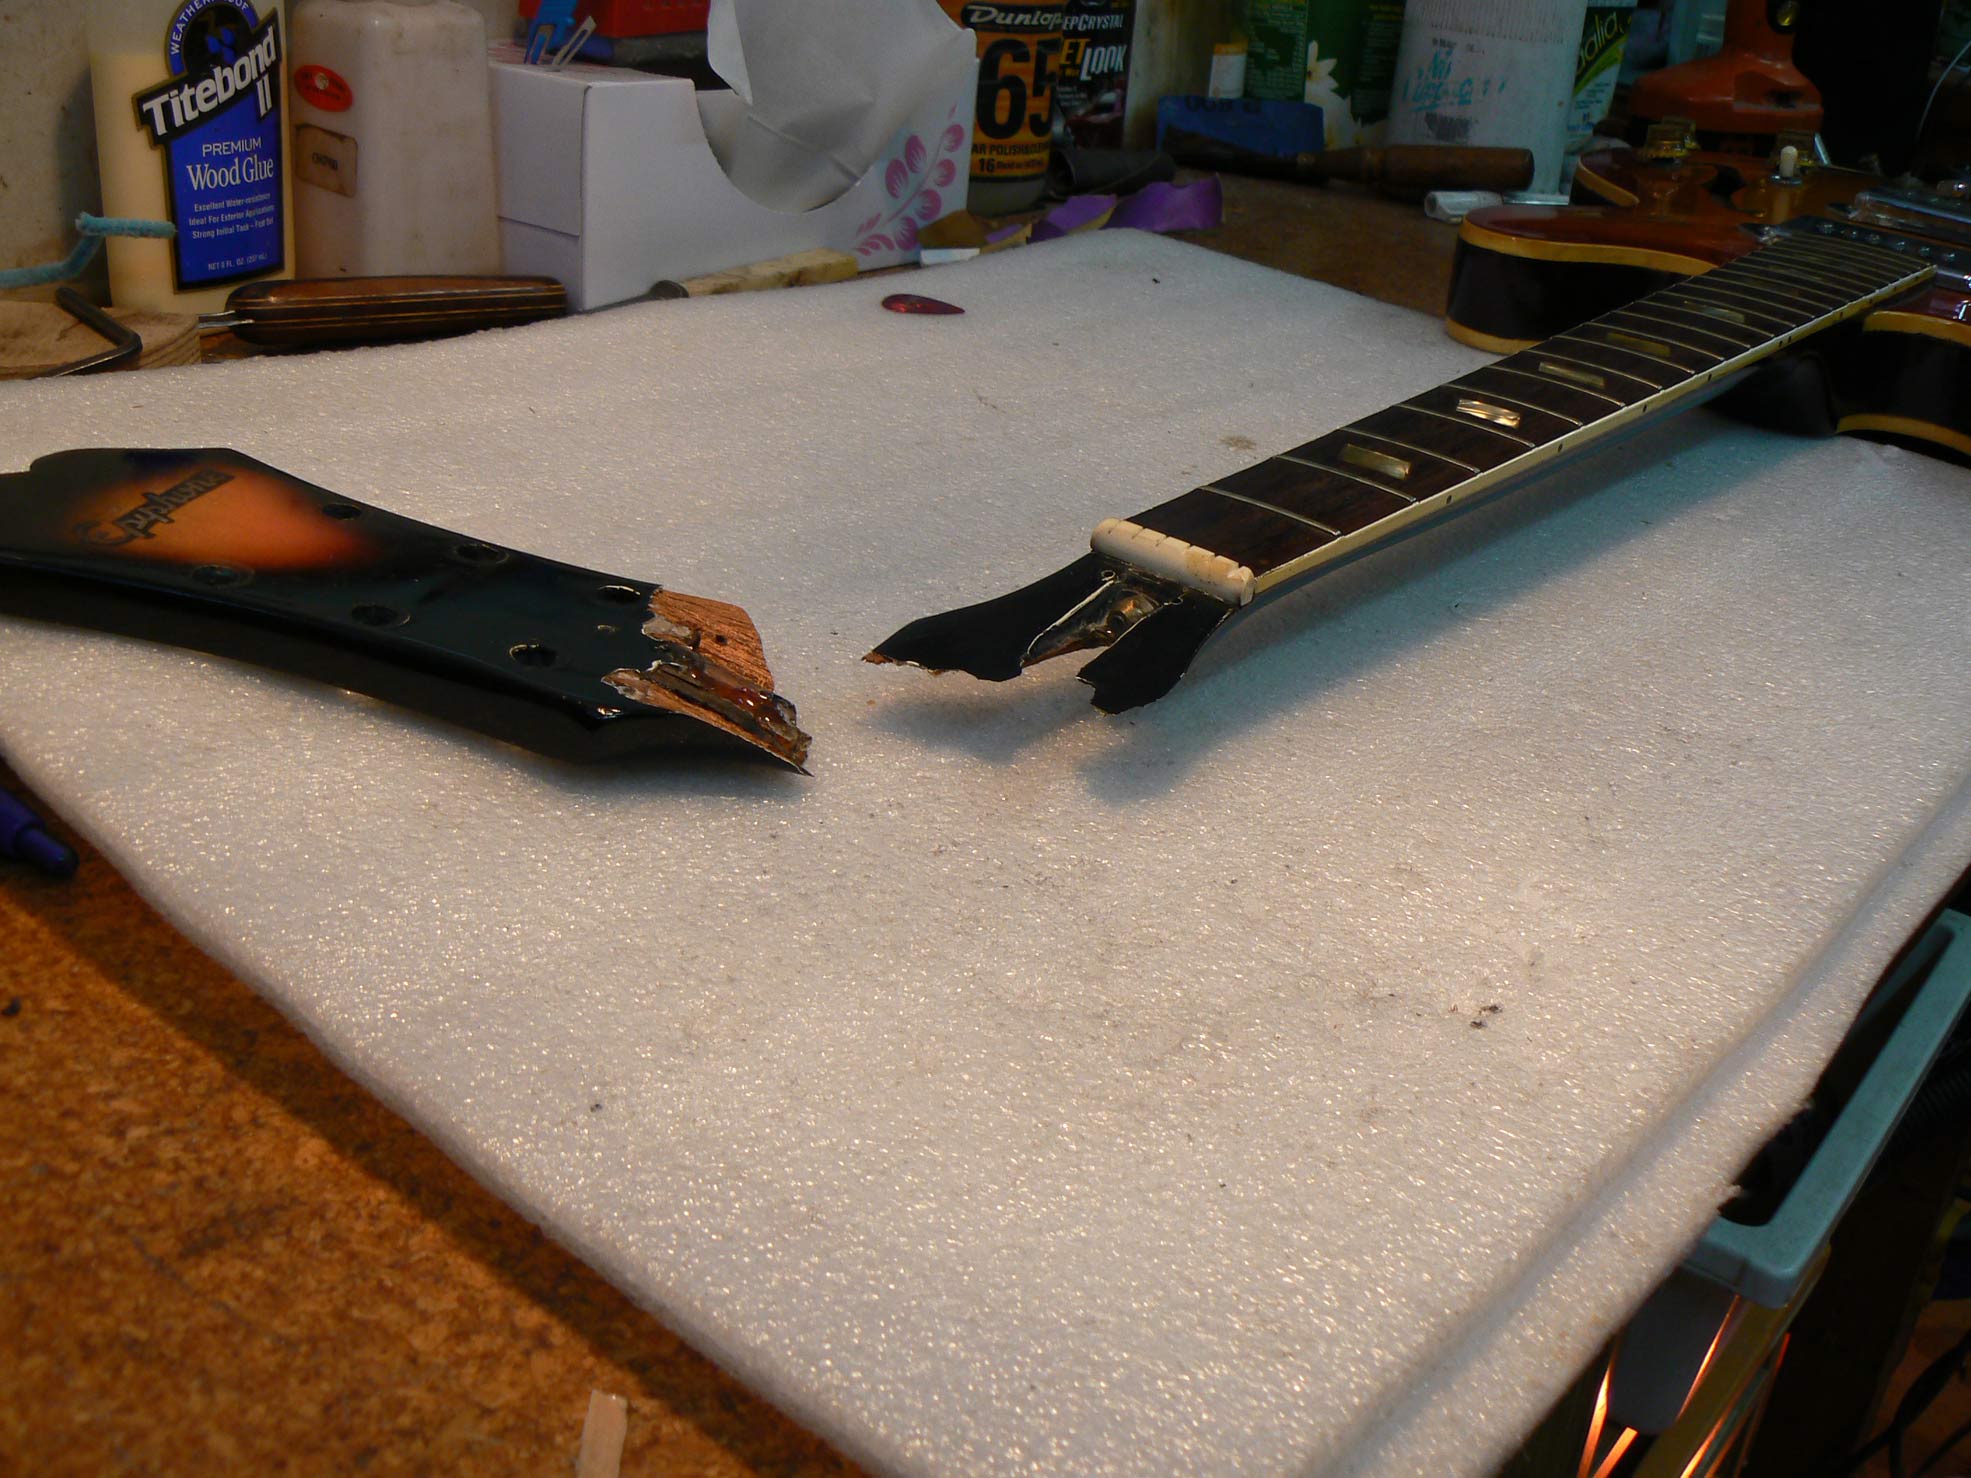
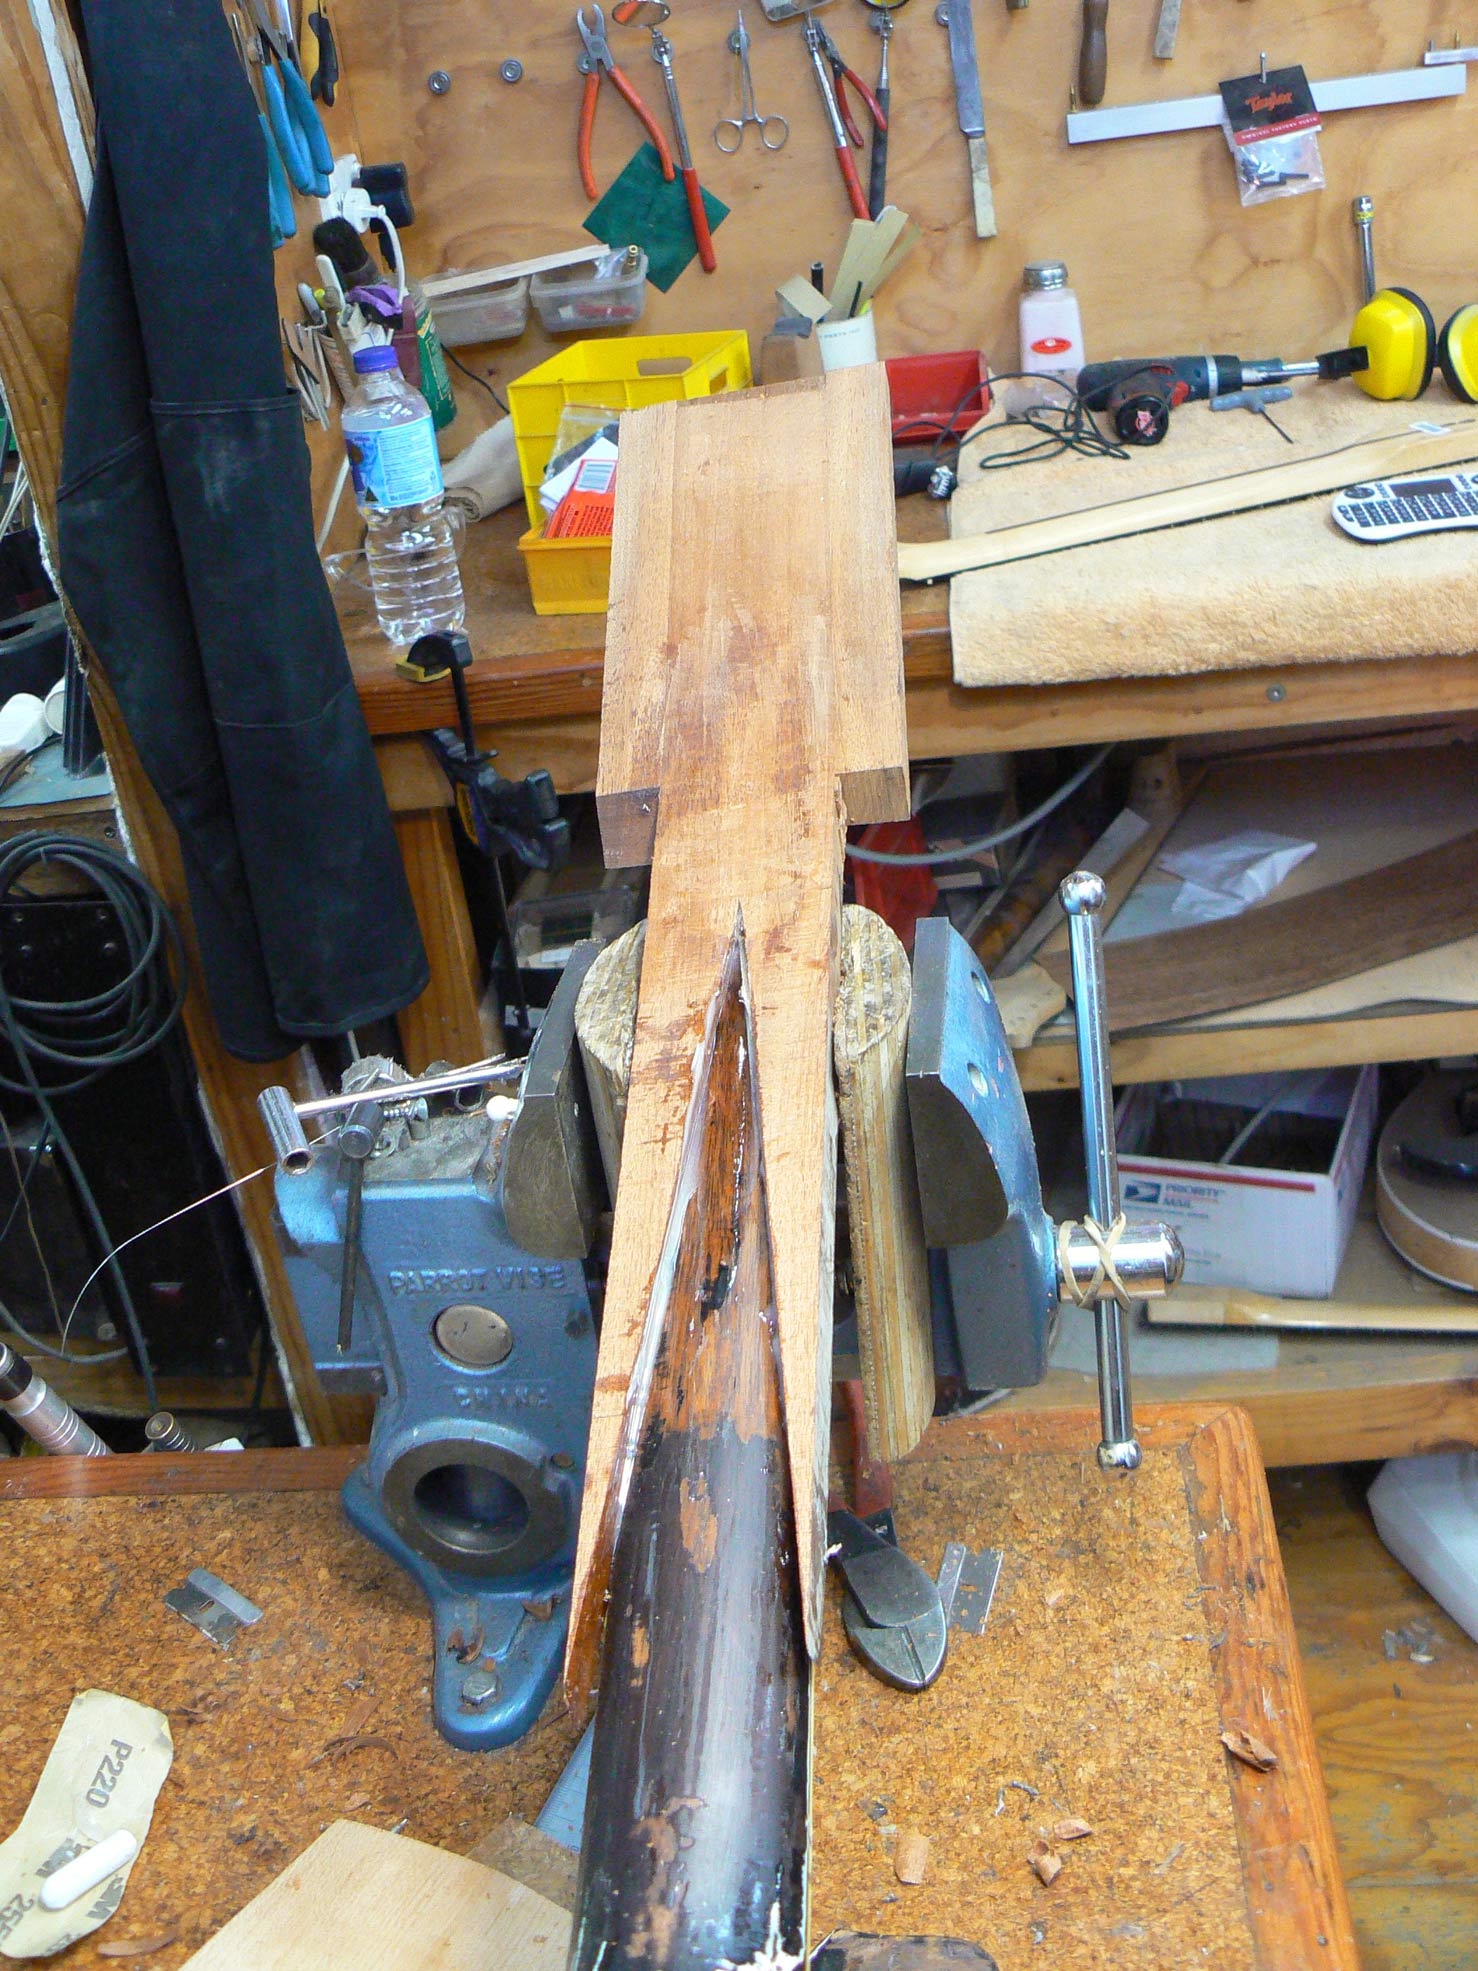
The neck splice geometry was laid out and cut down to the fingerboard joint and a new piece of mahogany cut to fit.

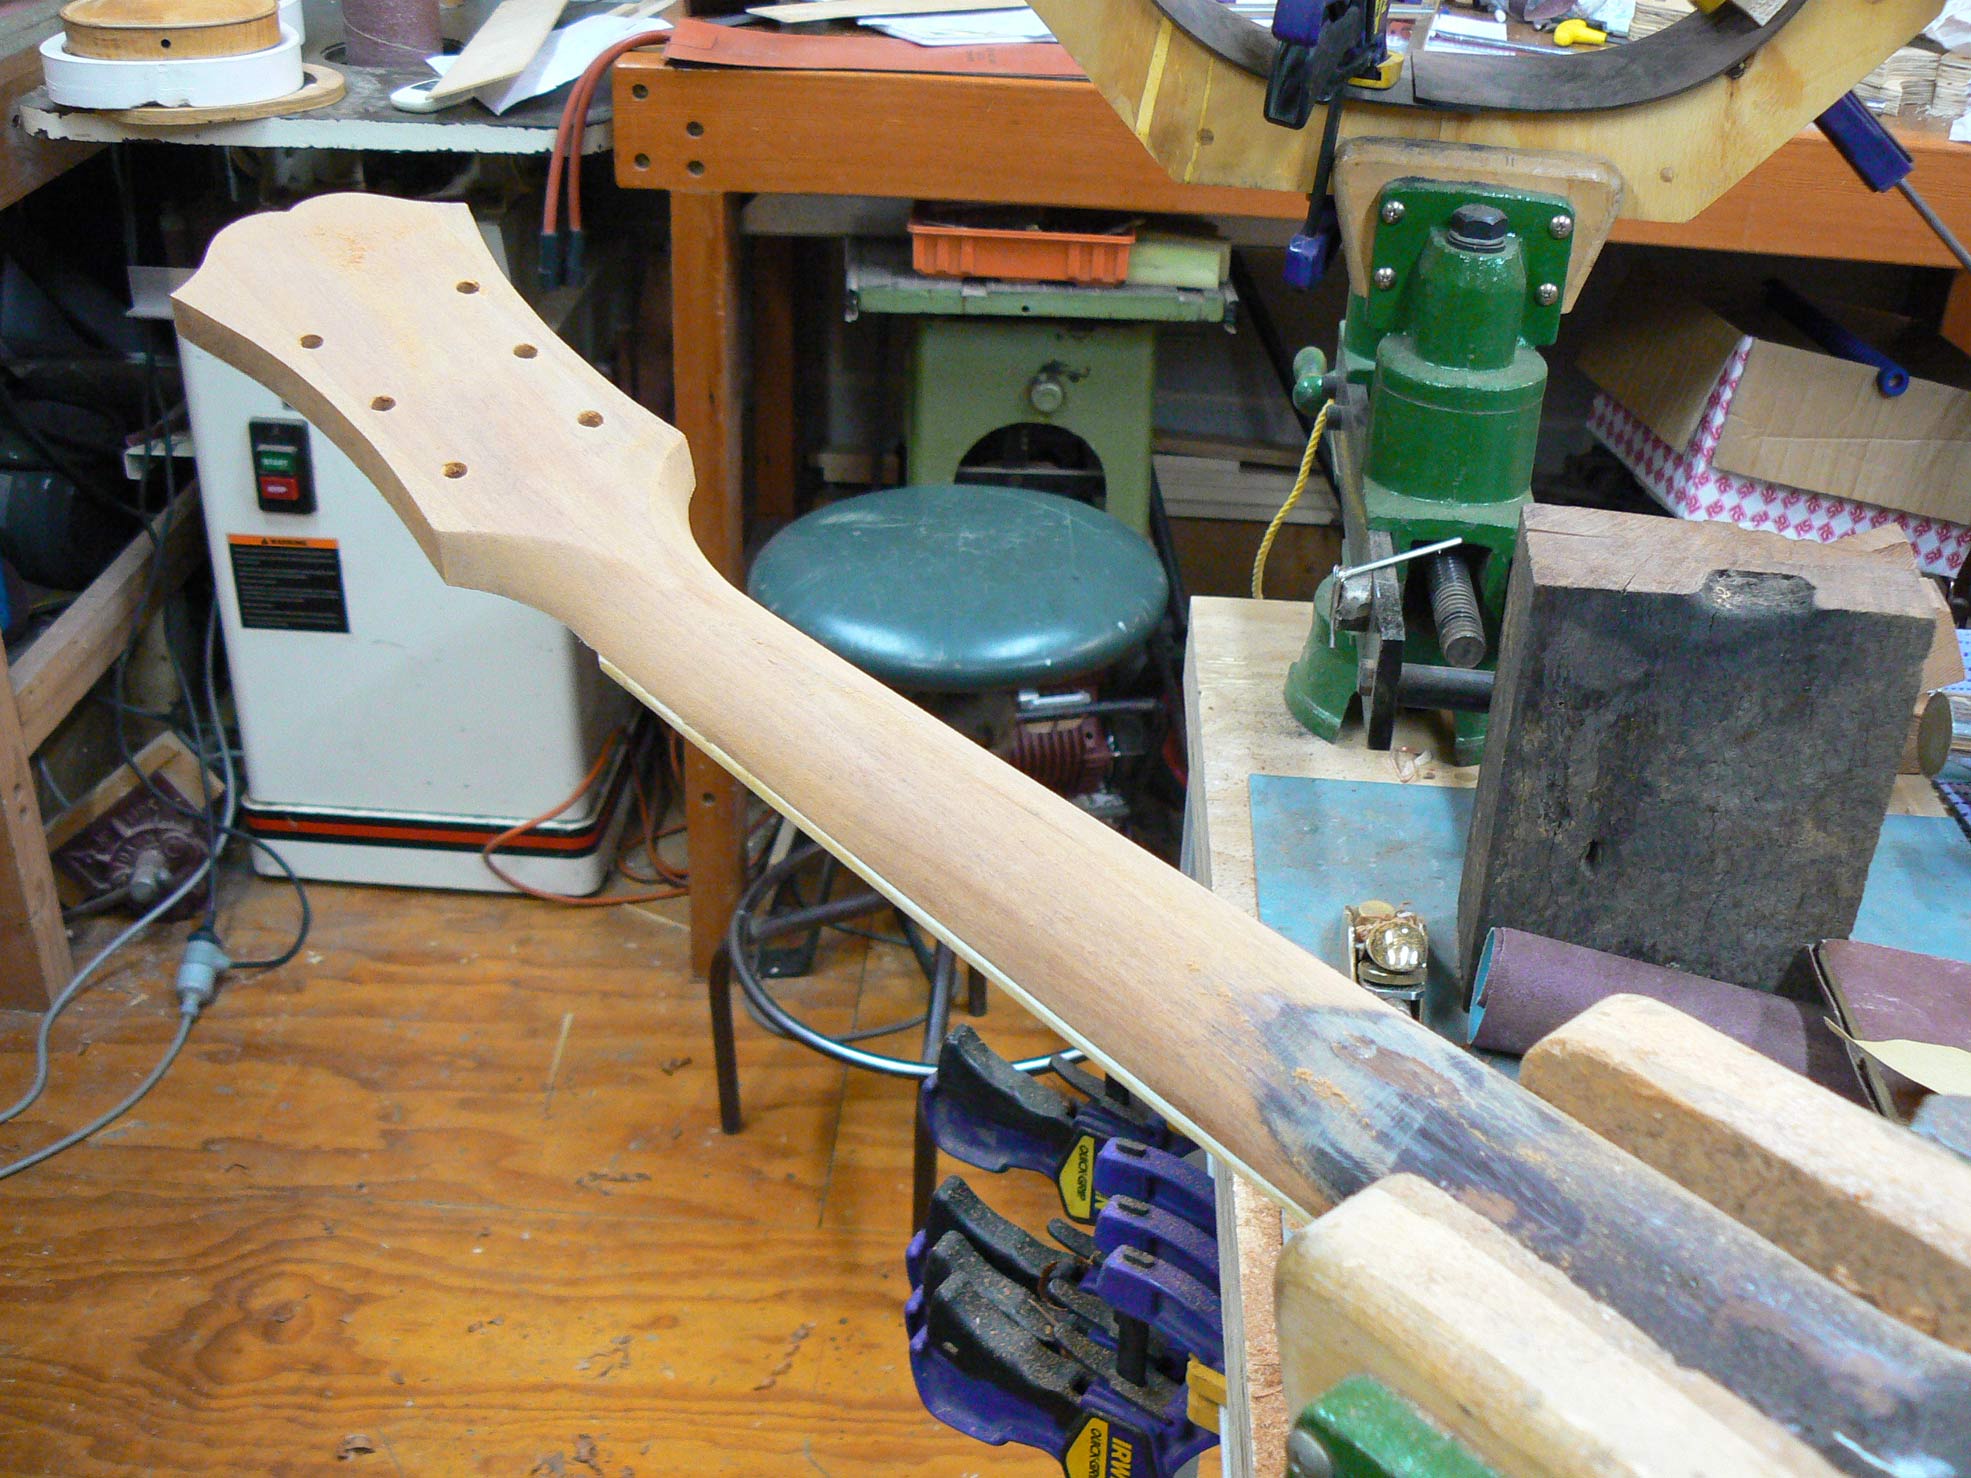
After careful fitting, they were married together using epoxy resin for the strongest possible, non water based joint. Headstock “wings” were added to increase width as per the original and a face veneer glued on. The head profile and all detail pencilled in.

The added material and head was then shaped to blend in with the neck. Many photos were researched as a guide to allow the correct shaping, including the bevelling of the front edges of the headstock which is unique to the instruments vintage.
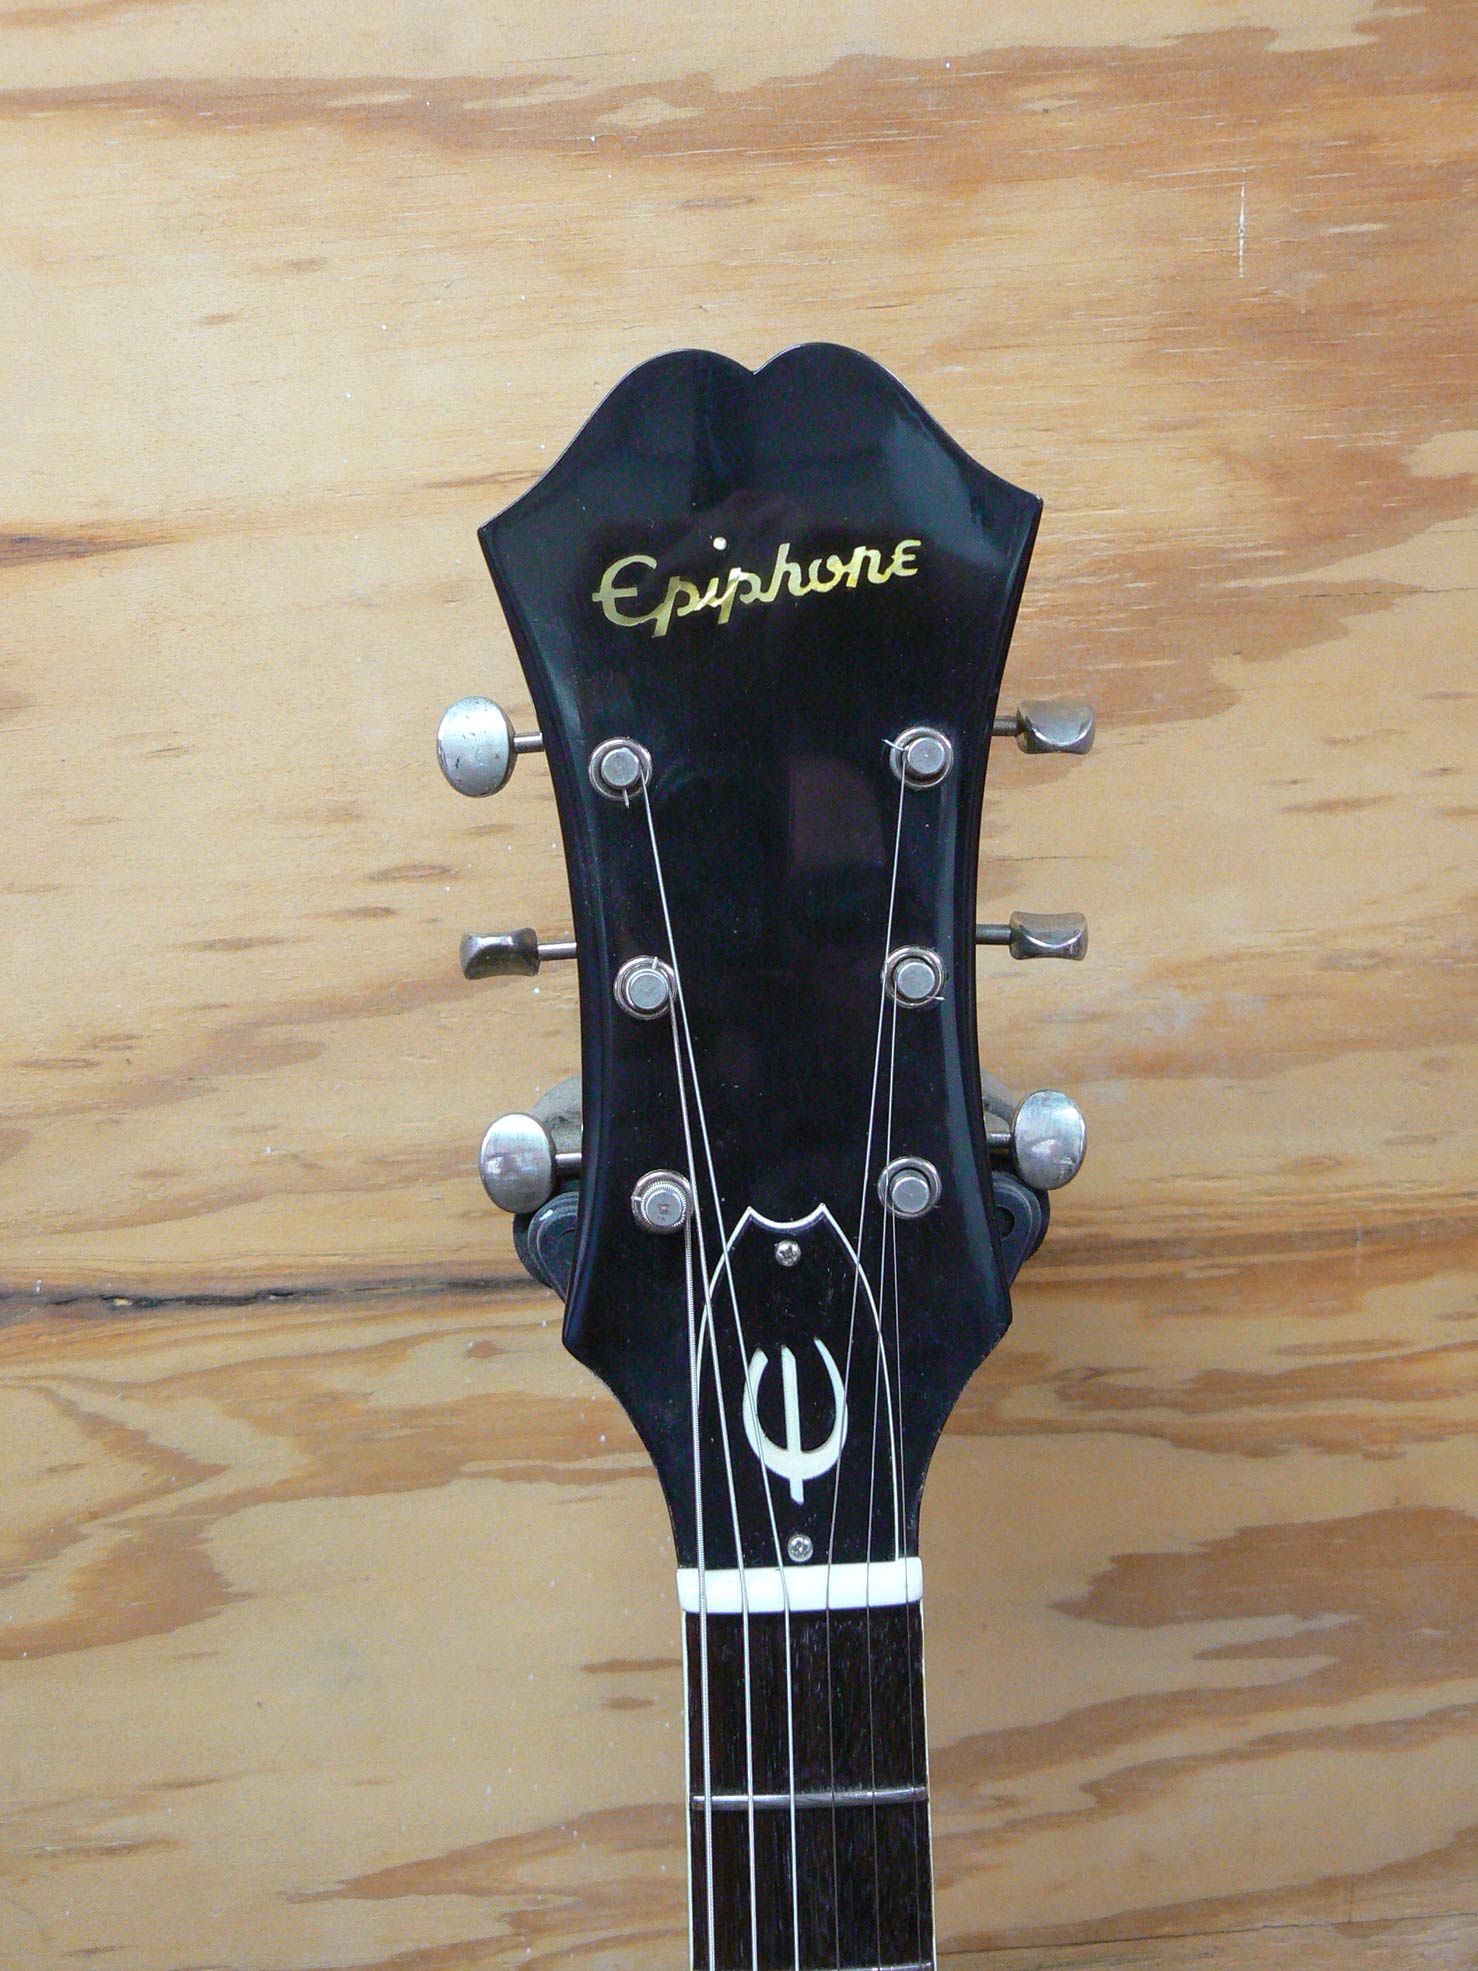
The Epiphone logo inlay was originally done as can be seen in an oversizes cavity with black filler, originally the face was painted black and the pearl scraped clean to the black filler allowing a production line to do a faster job of scraping the finish around the letters. Gibson have also used this technique among others through the decades. The inlay was removed from the head by a saw cut parallel to the head face and routing around the inlay and keeping to the
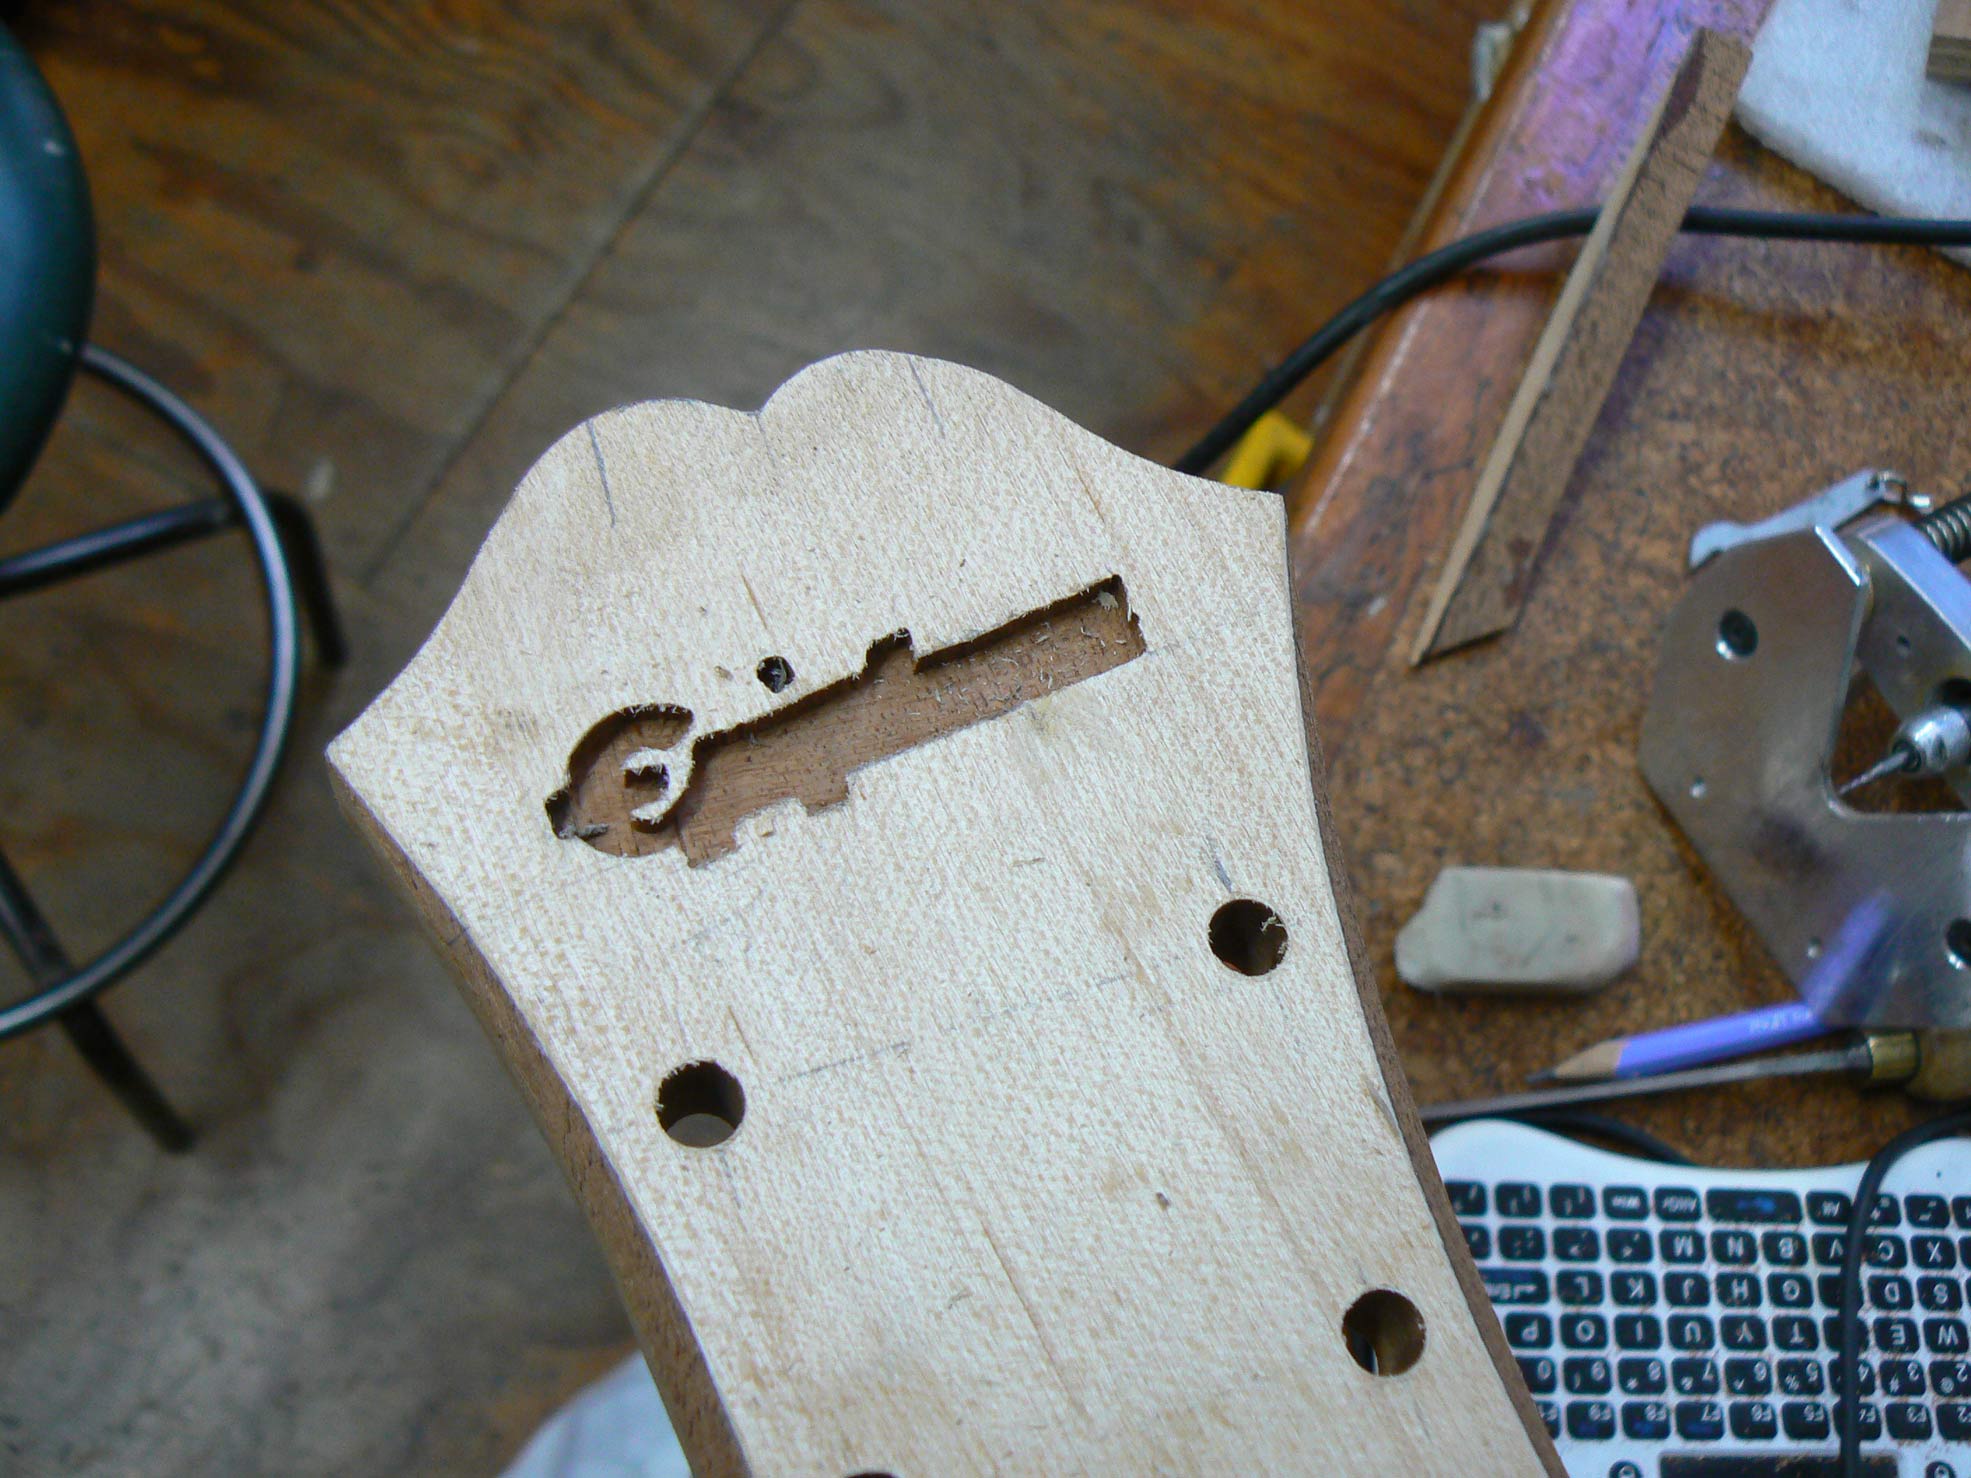

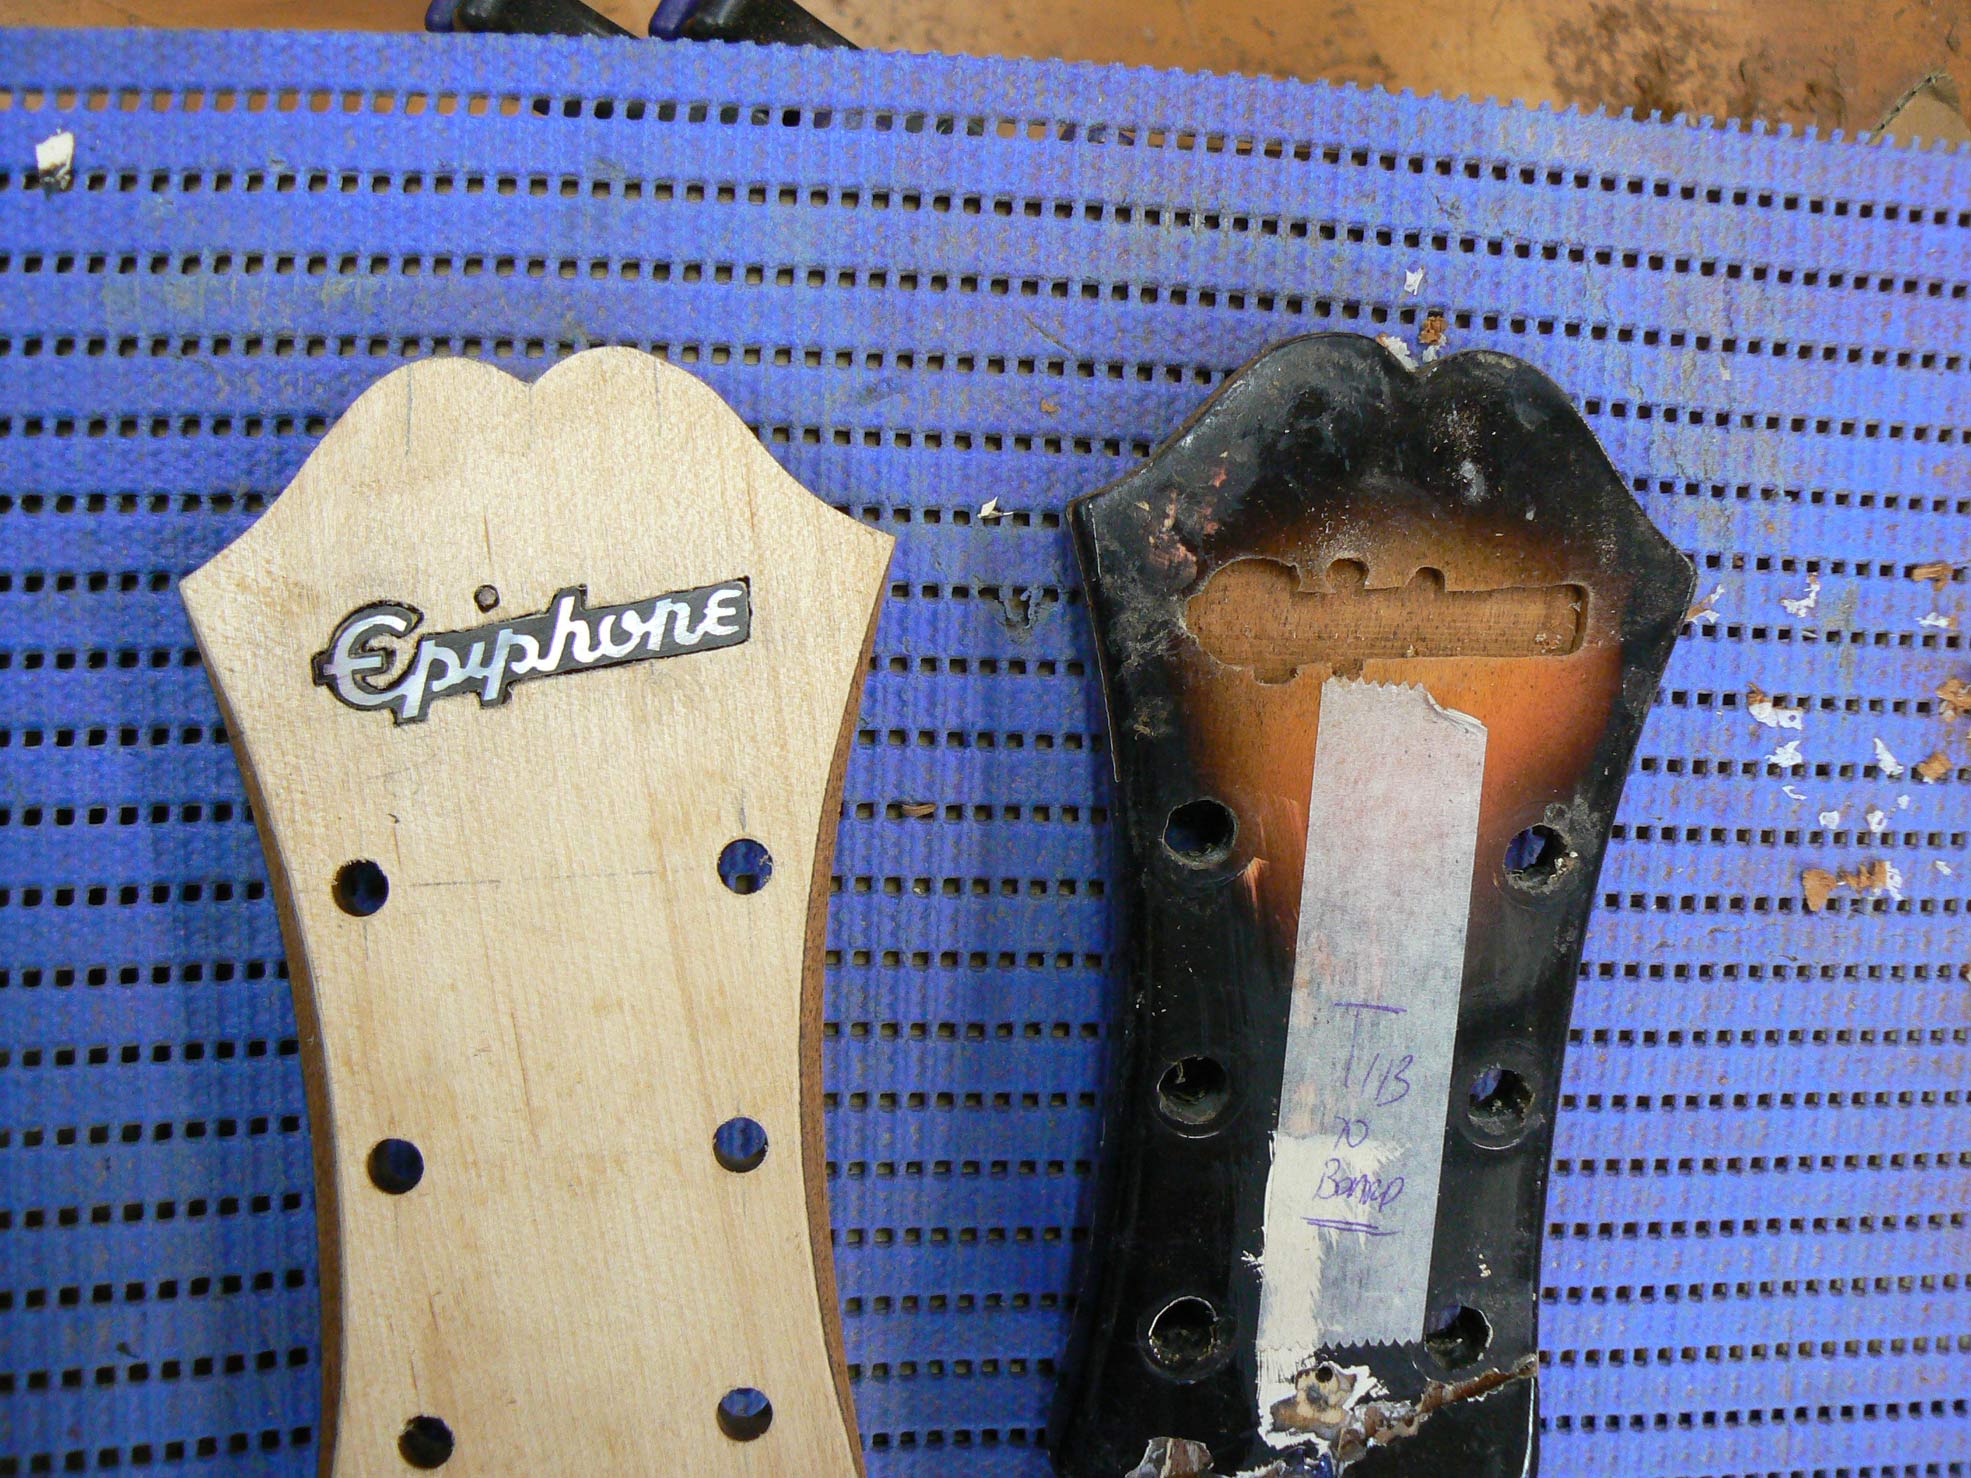 original build standard it was re inlayed with the same style oversized cavity and black filler.
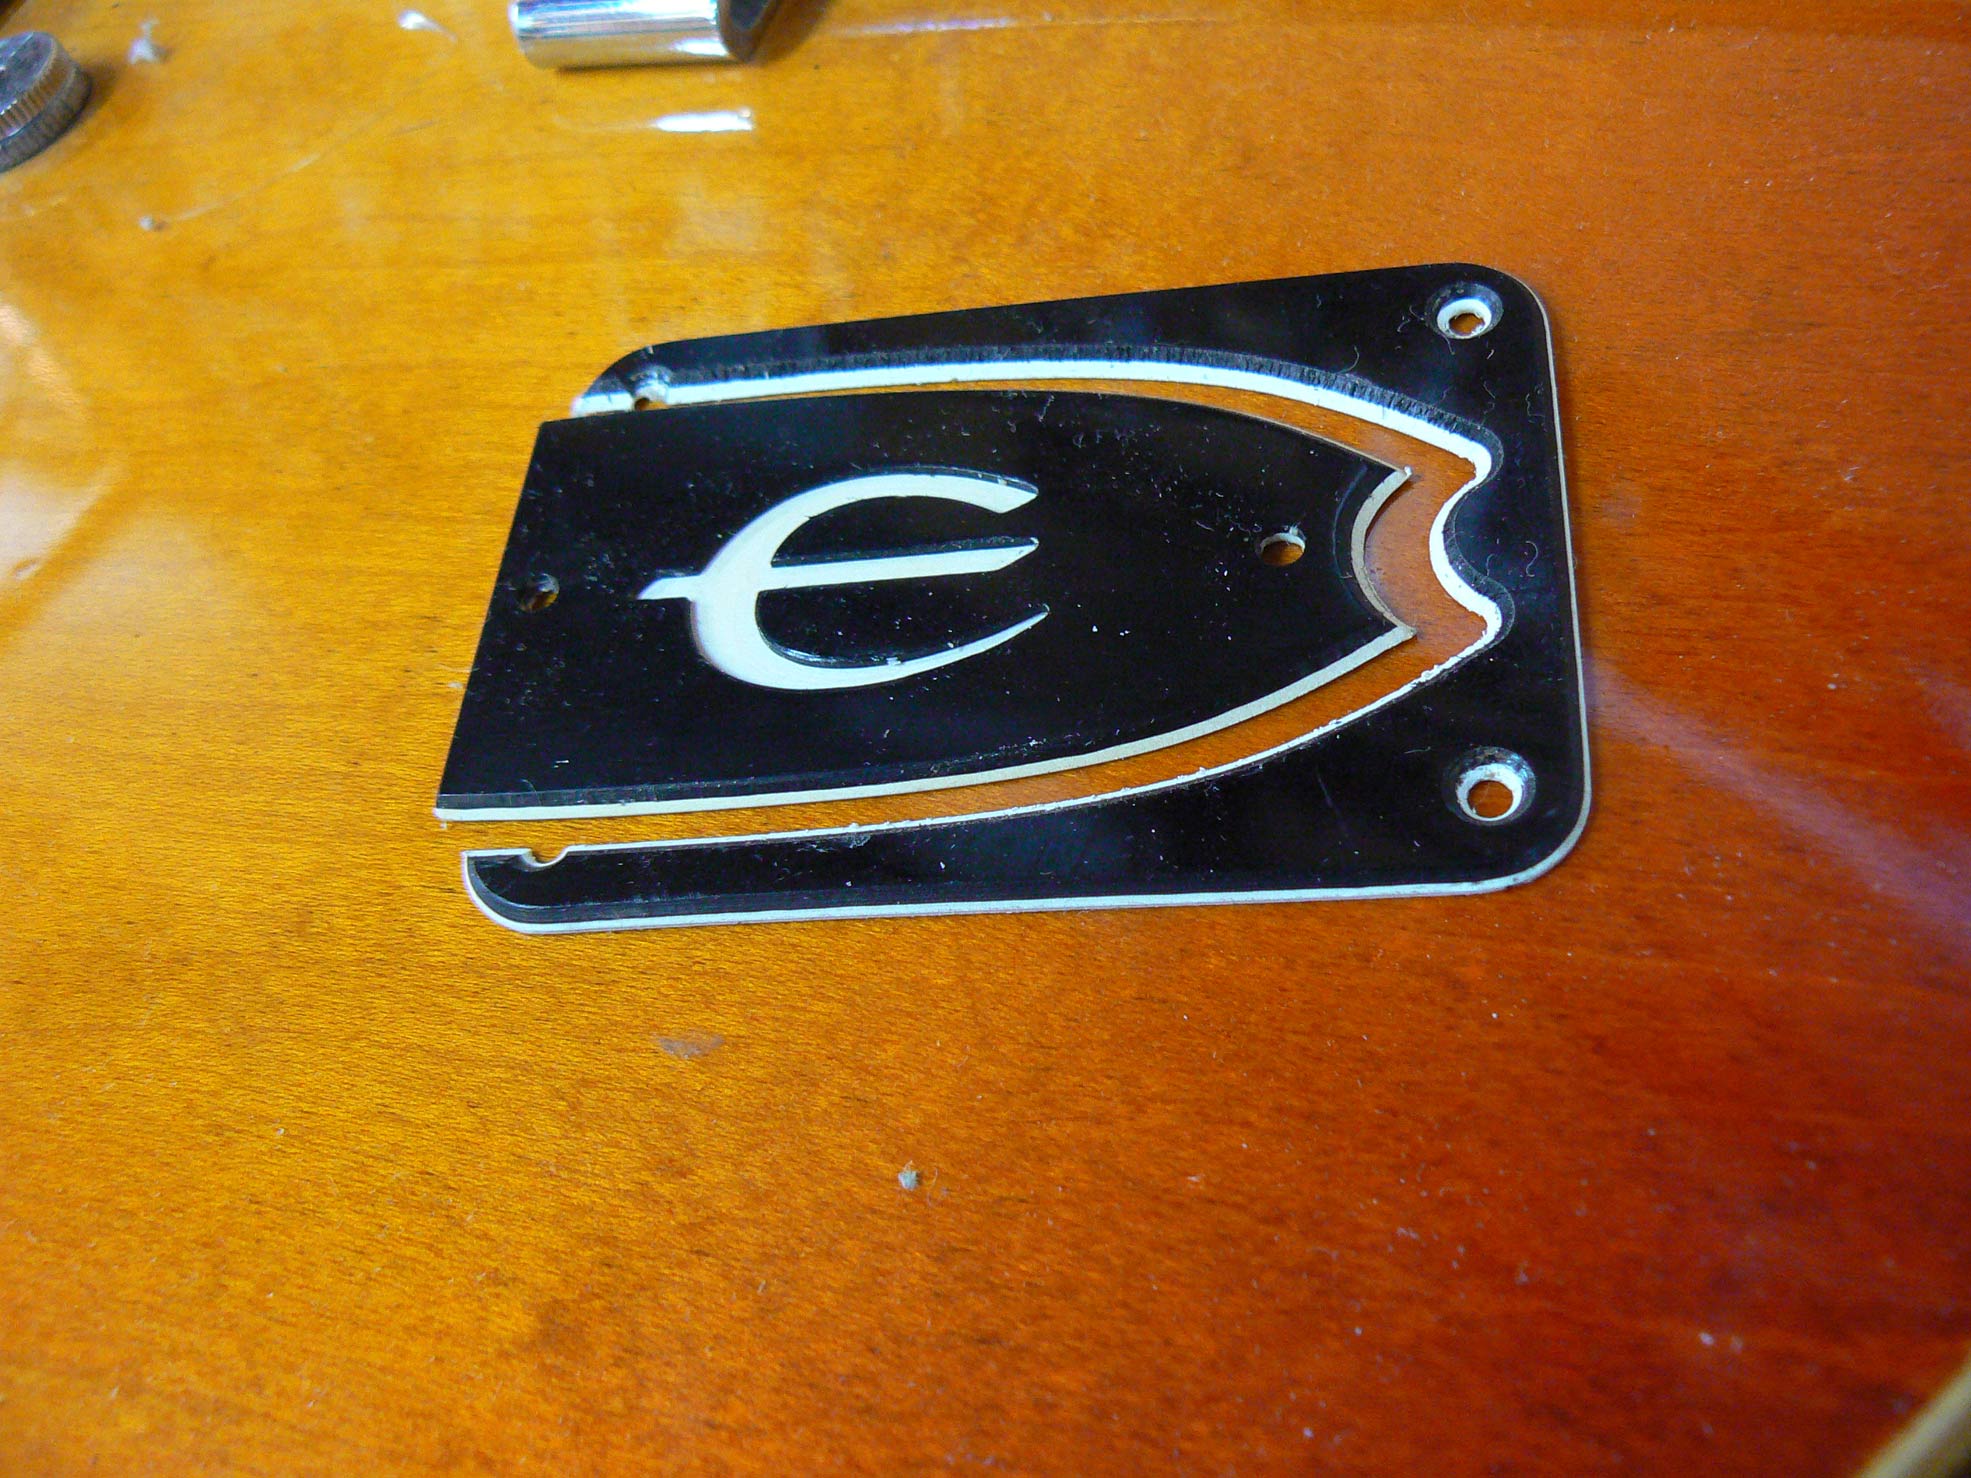
The truss rod cover that came on the guitar was not original ( 3 hole) Orioginal covers are very hard to find, so after confirming the original 2 hole positions from the remnants of the original head I recreated the artwork for the cover shape and engraving. USing an old piece of material from my parts bin, I fabricated a new “old” cover.
After detail sanding and checking, the original serial number was re stamped into the rear of the head and initial finish work done.


The finish was aged and gently worn in or “relic’d” to match the patina of the rest of the instrument, and this was also done to a new set of Kluson style tuners and “bootlace” ferrules. A fret level/crown and polish then new nut and setup and the job completed. As mentioned, there are many ways to repair a head, they all involve careful consideration of the instruments current condition, rarity and a respect for maintaining as much of the original material as possible whilst still delivering a functional result. I will try to post some other methods from my archive as time permits.